¶ Step 1: Add and Verify Your Domain
The first step to start working with the EmailMassivo service is the procedure of adding and verifying your domain. This is necessary so that real recipients of your campaigns and email service algorithms can properly identify your campaigns with your corporate domain, which helps deliver emails to the "Inbox" folder rather than "Spam".
The domain connection and verification procedure is performed once and consists of four main steps, each of which we will cover in this article:
- Connecting a corporate domain
- Domain verification
- Sender on your own domain
- Domain registration in PostMaster service
¶ 1. Connect Your Corporate Domain to EmailMassivo
To add your domain, go to the "Senders" menu, then to the "Domains" tab and click the "Add Domain" button.
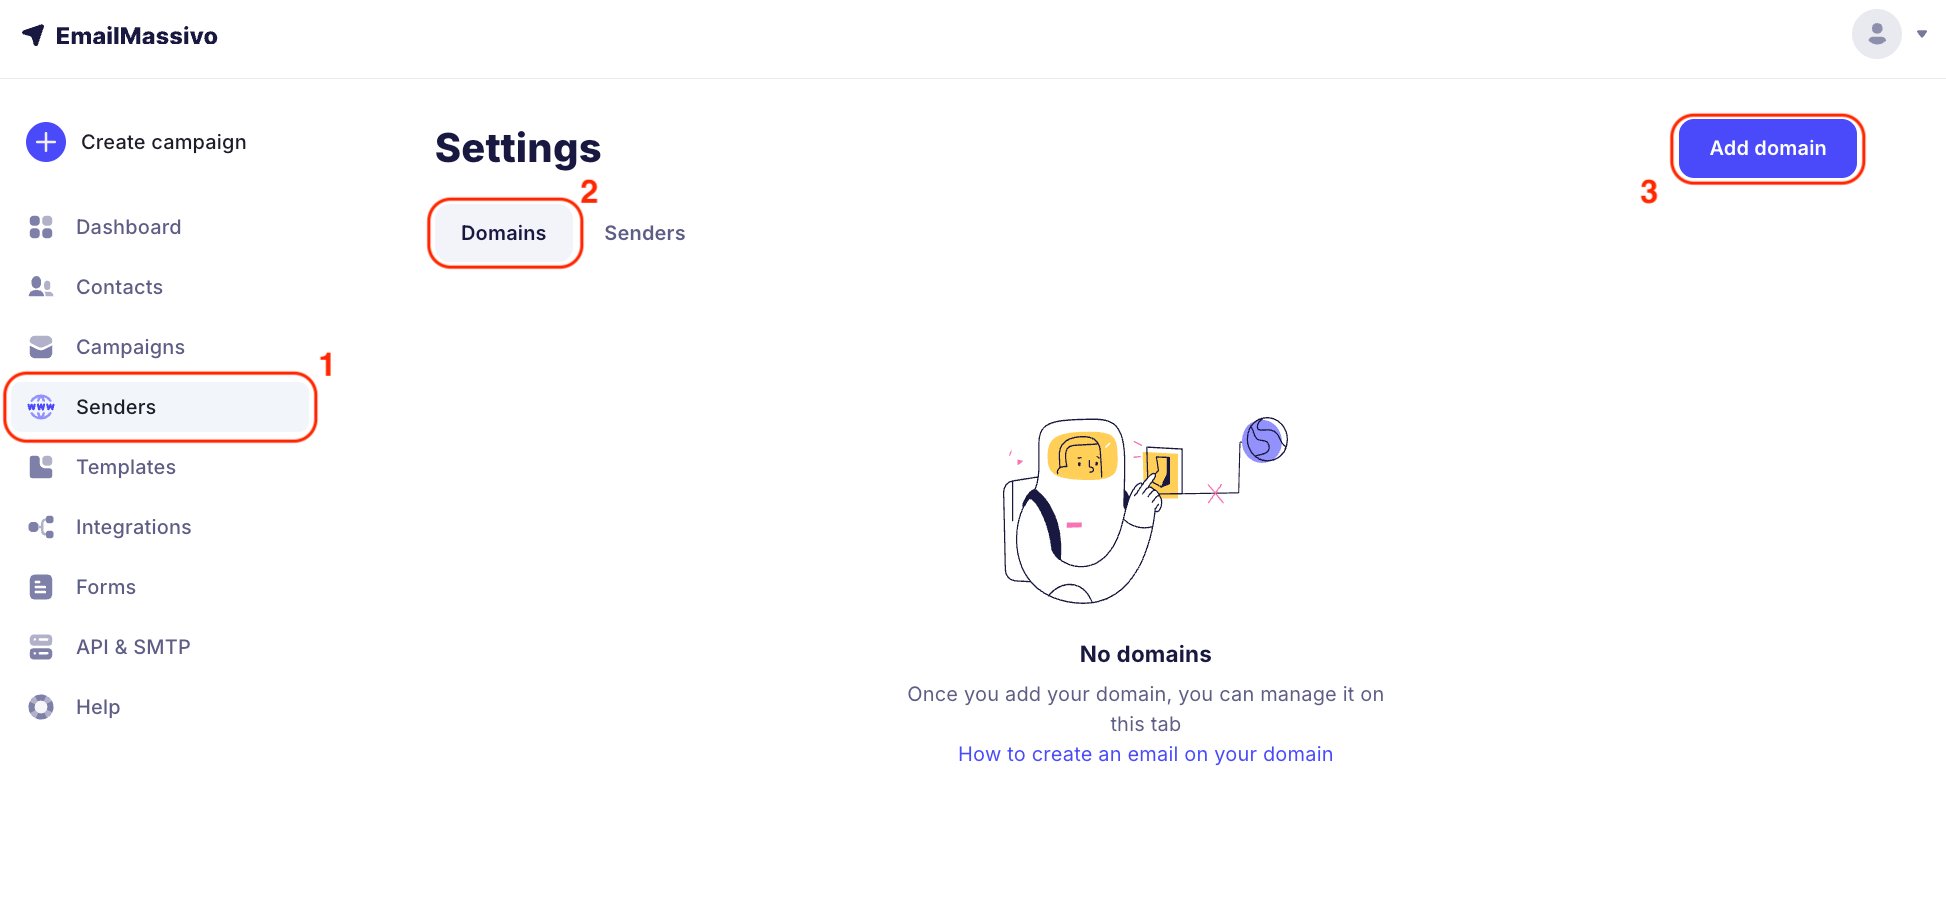
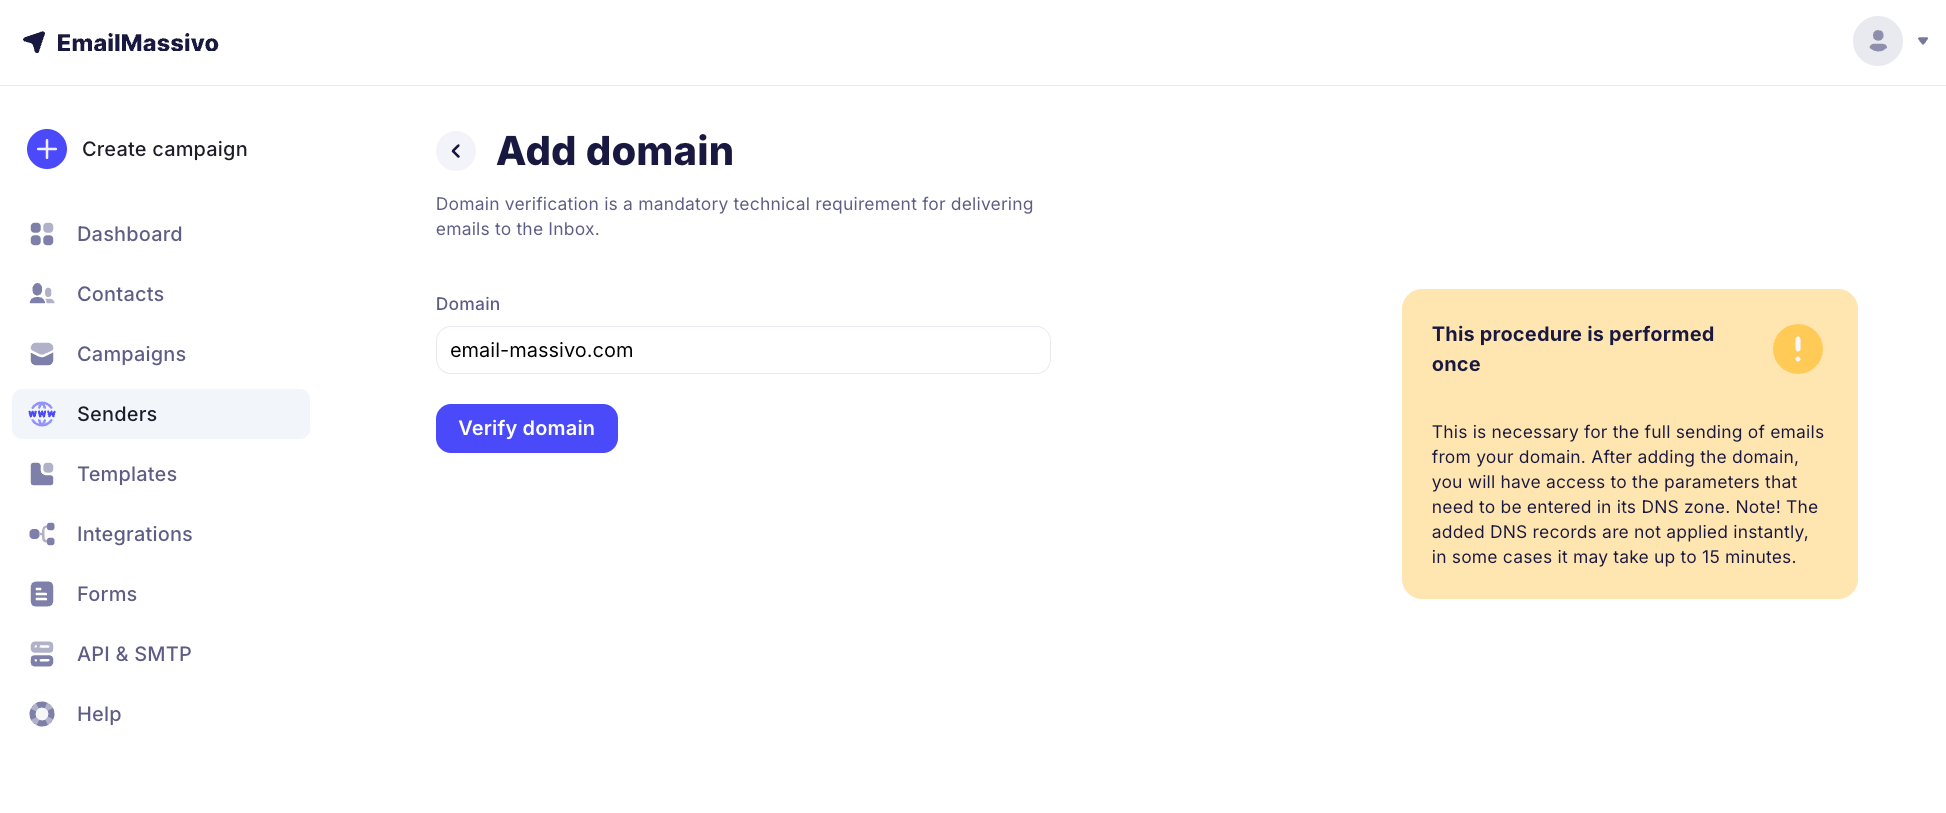
Then paste your domain address in the "Domain" field, as shown in the example below:
Important!
The screenshot uses the domain email-massivo.com for illustration purposes only. When setting up, specify your own domain.
Important!
Domain verification and having a sender on your own domain are mandatory conditions for sending campaigns and preventing emails from going to spam.
¶ 2. Verify Your Domain on the Registrar's Website
After adding the domain, click the "Verify Domain" button. In the EmailMassivo control panel, you will have access to records that need to be added to your domain's DNS record settings:
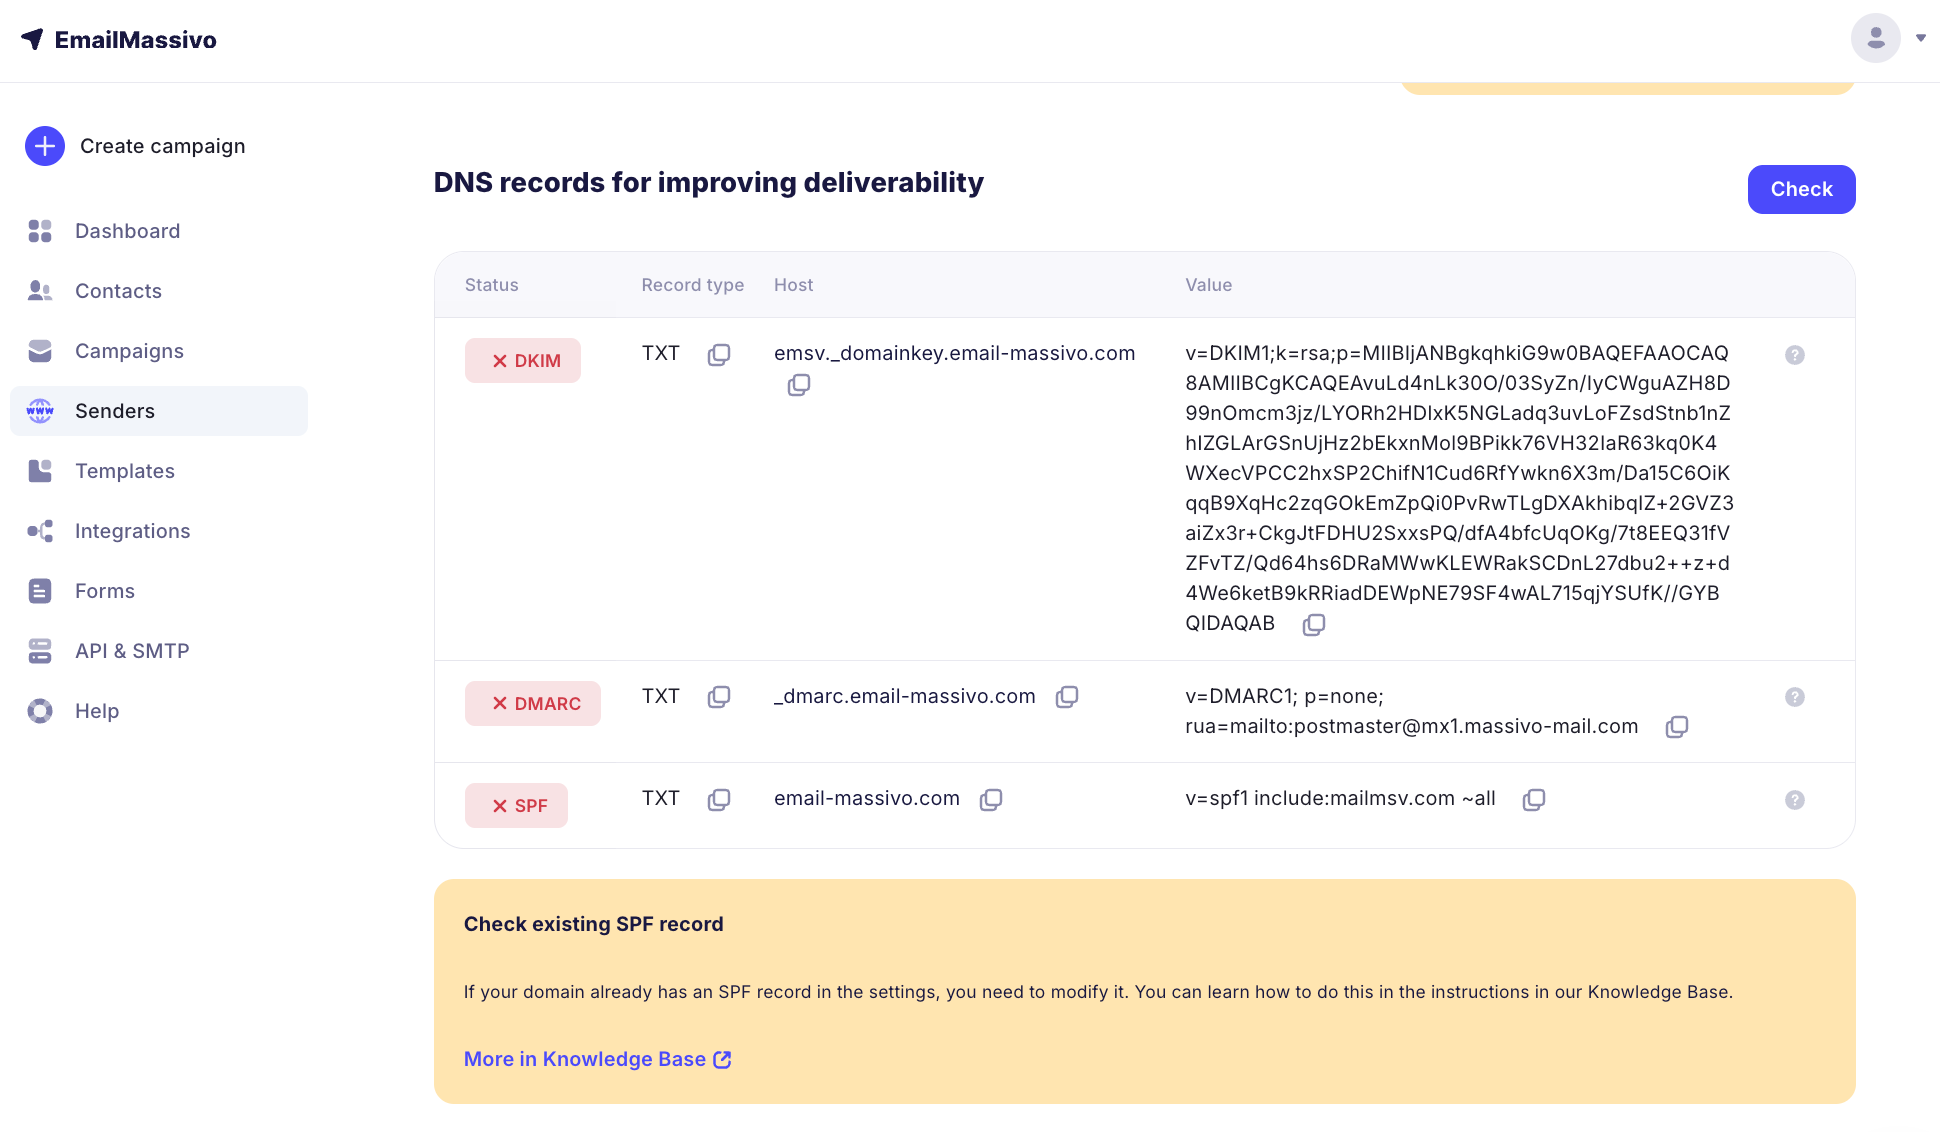
Next, to connect the domain you need to add or edit resource TXT records on the website of the service that manages the NS records of your corporate domain.
The procedure for changing DNS records may differ depending on the service managing your corporate domain.
It's also important to note that when editing or adding new DNS records, they are not applied instantly. Typically, applying updates takes from 20 minutes to 2 hours. In some cases, this process can take up to 72 hours.
You can check which service manages your domain using online services for checking whois domain data.
If you are going through the domain verification procedure for the first time and/or need additional information or help to complete this step, please refer to the detailed step-by-step instructions in our Knowledge Base, or contact EmailMassivo support.
¶ 3. Create Email on Your Domain and Add a Sender
If you don't have email on your domain and are just about to set it up – no problem. Please use the detailed step-by-step instructions for these cases:
Creating email on a domain in Google
Creating email on a domain in Microsoft 365
Before creating an email campaign, you will need to specify or fill in information about the sender, that is, the email address from which the campaign will be sent.
By default, after registration you already have one sender – this is your registration email (if it is not prohibited by DMARC policy), but to send campaigns you need to add a sender address that is registered on your own domain. Sending emails from your own domain improves email passage through spam filters.
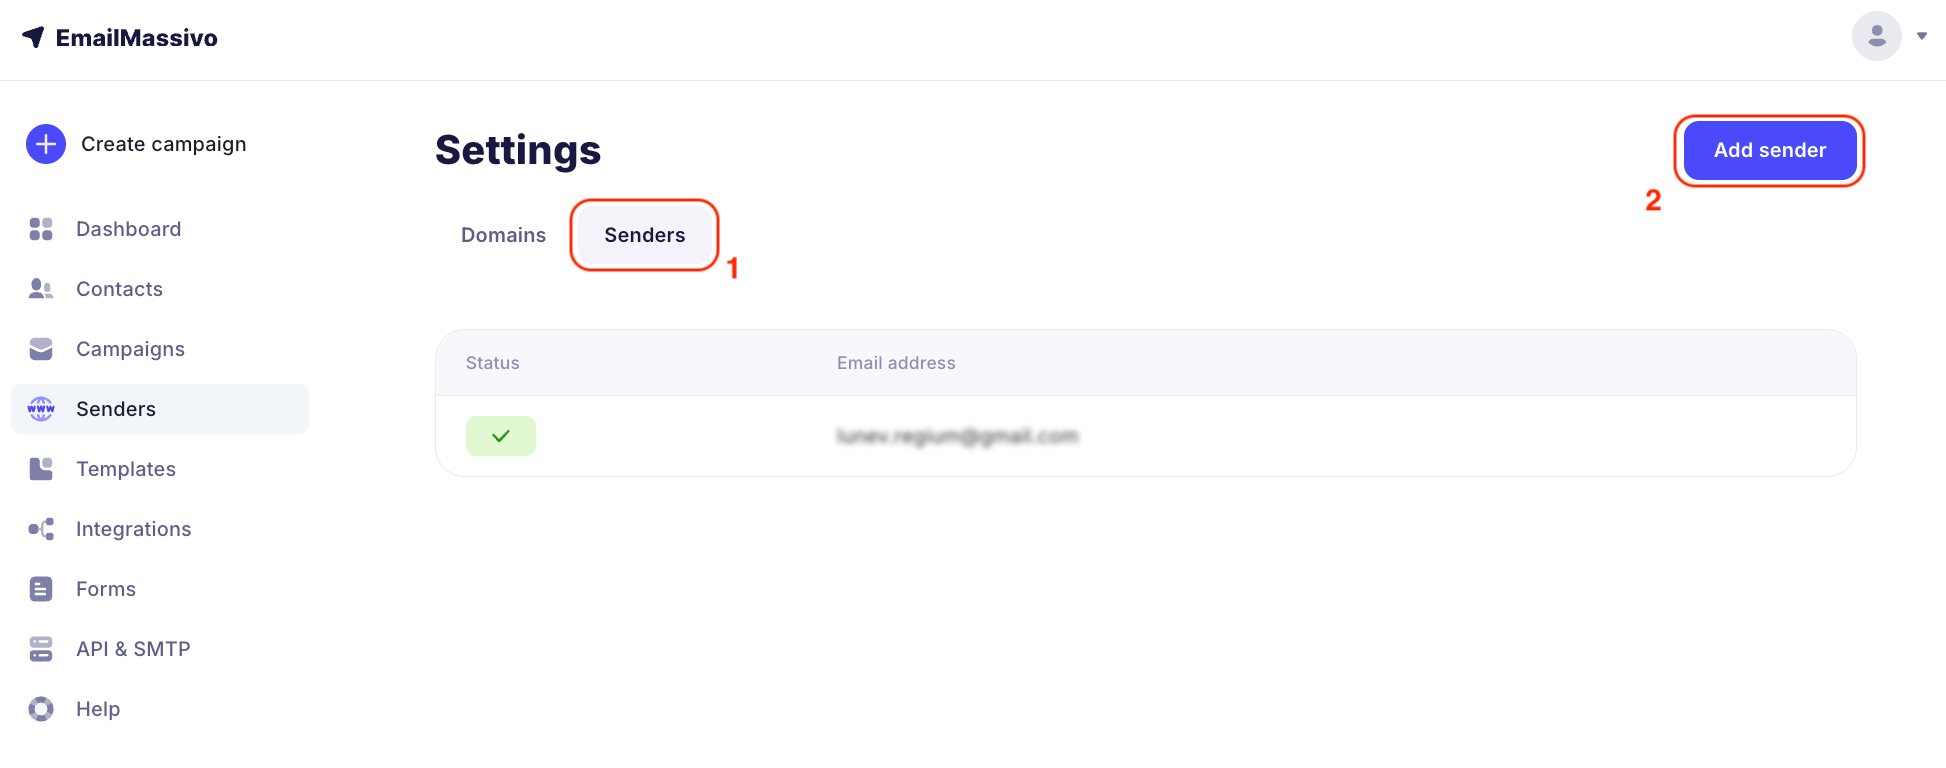
To add a new sender, go to "Senders" and click "Add Sender".
You can find detailed instructions on how to add a new sender on your domain in our Knowledge Base.
¶ 4. Register Your Domain in PostMaster Service
To complete the initial setup procedure, we recommend that you register your domain in the PostMaster service.
This is necessary for deep analytics of your campaigns. PostMaster shows deliverability statistics, finds out why emails go to spam or don't reach subscribers, and helps find other possible errors.
For detailed step-by-step instructions on registering a domain in PostMaster Gmail, please read the article in our Knowledge Base.
If you are interested in receiving data from other email services and need help with completing this step, please contact EmailMassivo support.
¶ 5. Next Step
Congratulations on completing the domain registration and verification procedure! The good news is that this is the most complex step in setting up your campaigns, and it's behind you – you won't need to repeat it.
When you're comfortable continuing, we suggest you upload the database of email addresses of recipients for your campaigns in EmailMassivo. Read more about this in this article.
Note:
Didn't find answers to your questions? Please use the detailed step-by-step guide for adding a domain or contact the EmailMassivo user support team for help.