¶ Step 2: Upload Your Email Address Database
Now that you have successfully configured and connected your domain to EmailMassivo, we suggest you upload the email address database of recipients for your future campaigns. Before doing this, we recommend checking your database with an email validator to ensure that all addresses are current and won't be filtered as spam. This will help improve the quality of your campaigns and increase their effectiveness.
You can upload contacts in the "Contacts" section in any convenient way, including importing contacts from an external file – this is especially convenient if you previously used another service for email campaigns and now want to transfer your contact database to EmailMassivo.
The "Contacts" section will help you keep your client database up to date. You can add subscriber contact information and specify additional data (for example, date of birth, gender, company, etc.) for campaign personalization.
¶ 1. Upload Contacts to EmailMassivo
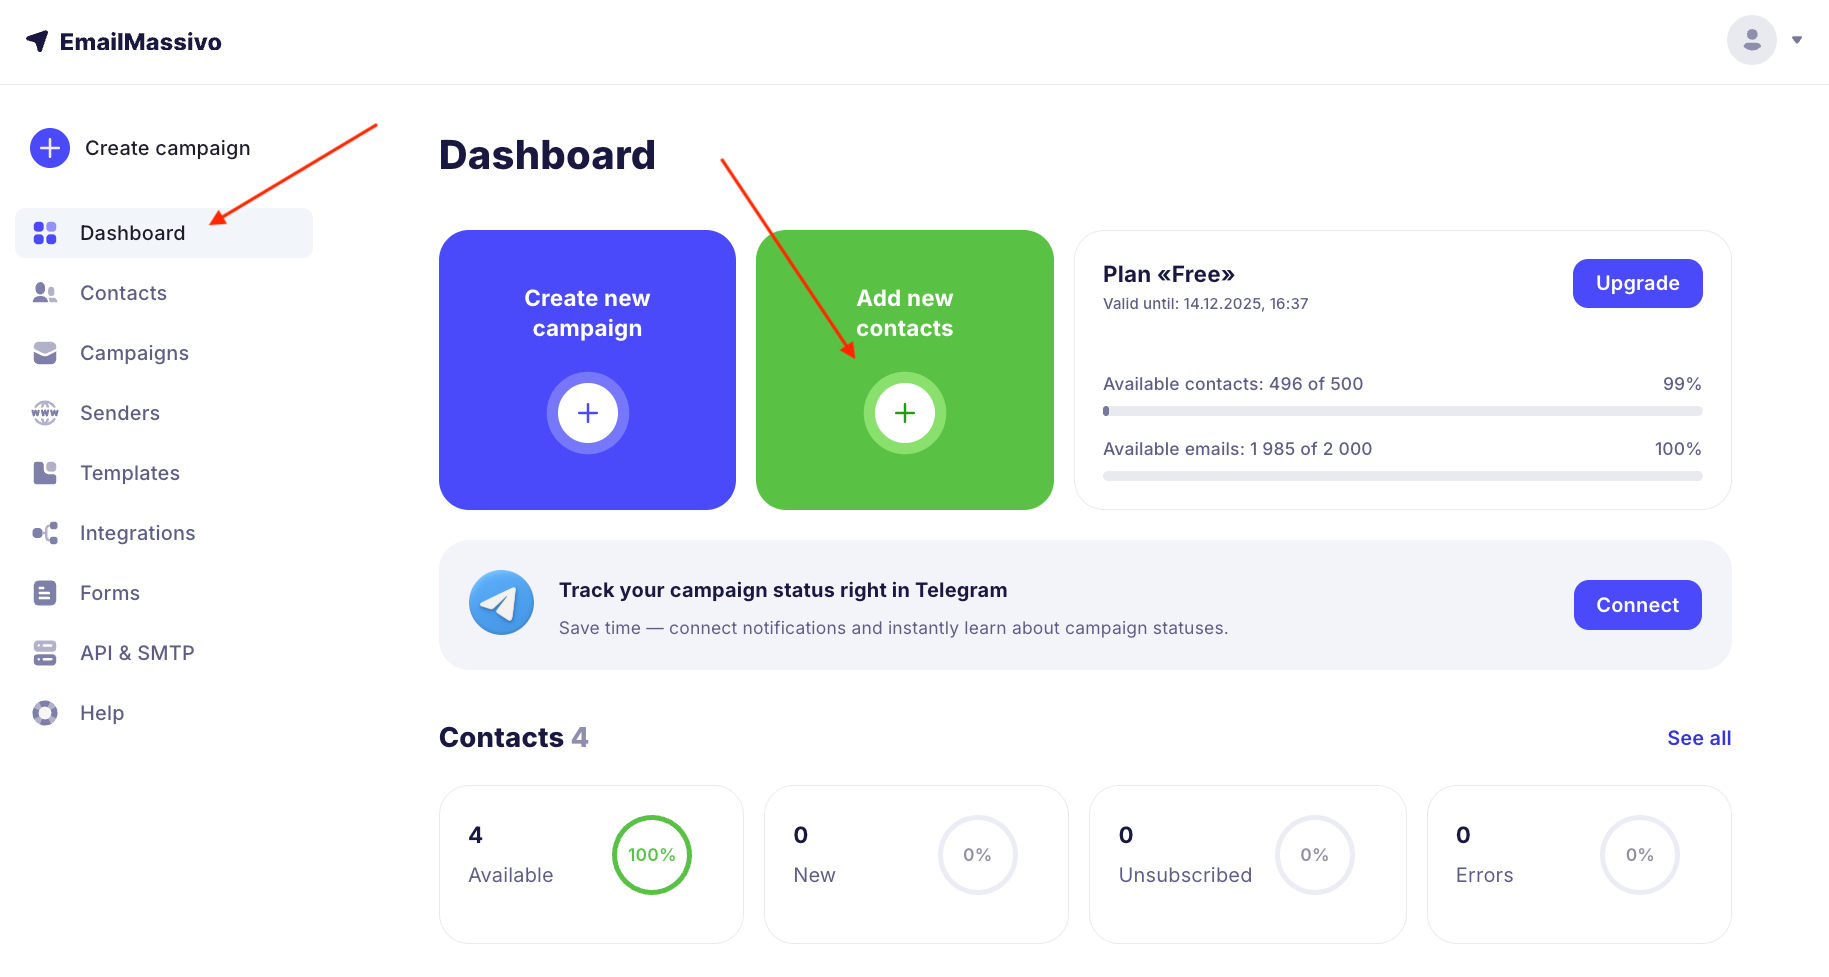
On the main page, click the "Add Contacts" button or go to the "Contacts" tab and click "Add Contacts".

New contacts can be uploaded in two ways:
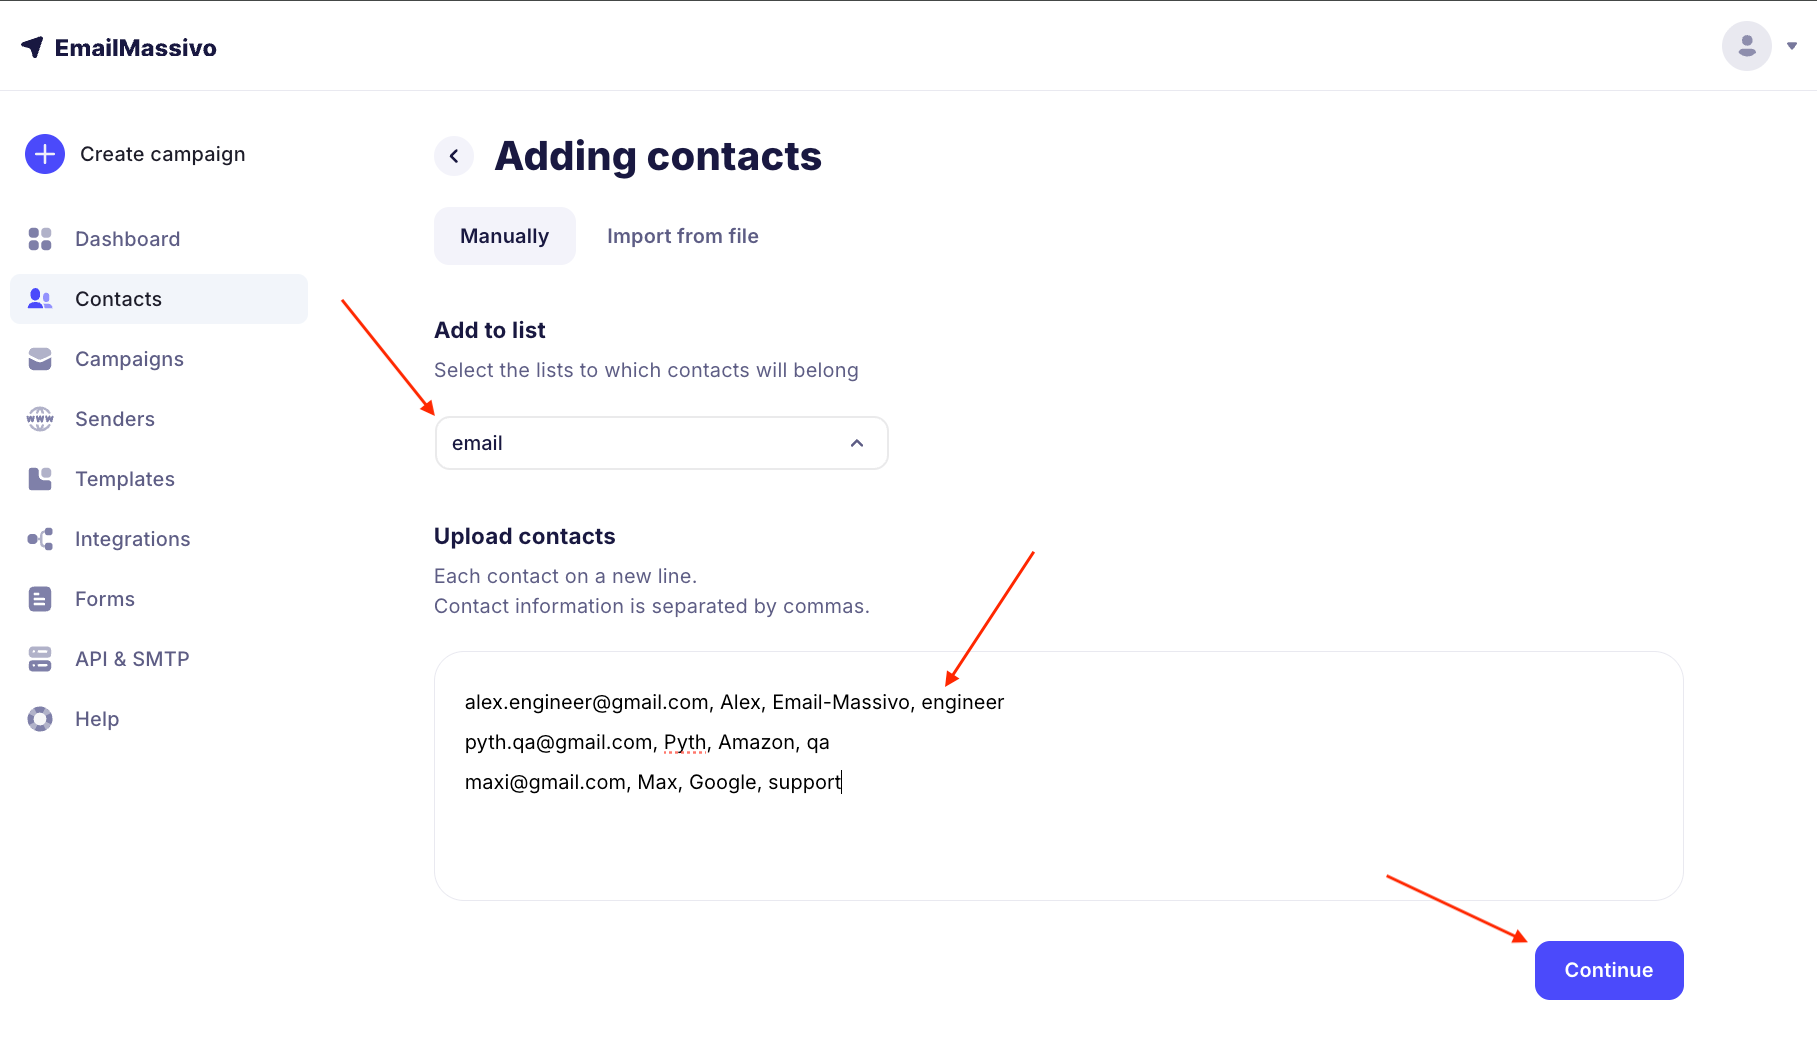
- manually – convenient for targeted replenishment and editing of the recipient database;
- import from an external file – convenient if you previously used another service for campaigns and/or store your client email address database in a CRM system or table.
We tried to make the contact addition interface intuitive and simple, but you can always refer to the detailed step-by-step instruction in our Knowledge Base – it describes both methods of adding contacts in detail.
¶ 2. Add New Contacts to a List
Select a list from existing ones or create a new list to which the contacts will belong. In the future, you will be able to send campaigns to different lists, segment contacts, and move them between lists.
¶ 3. Match Data
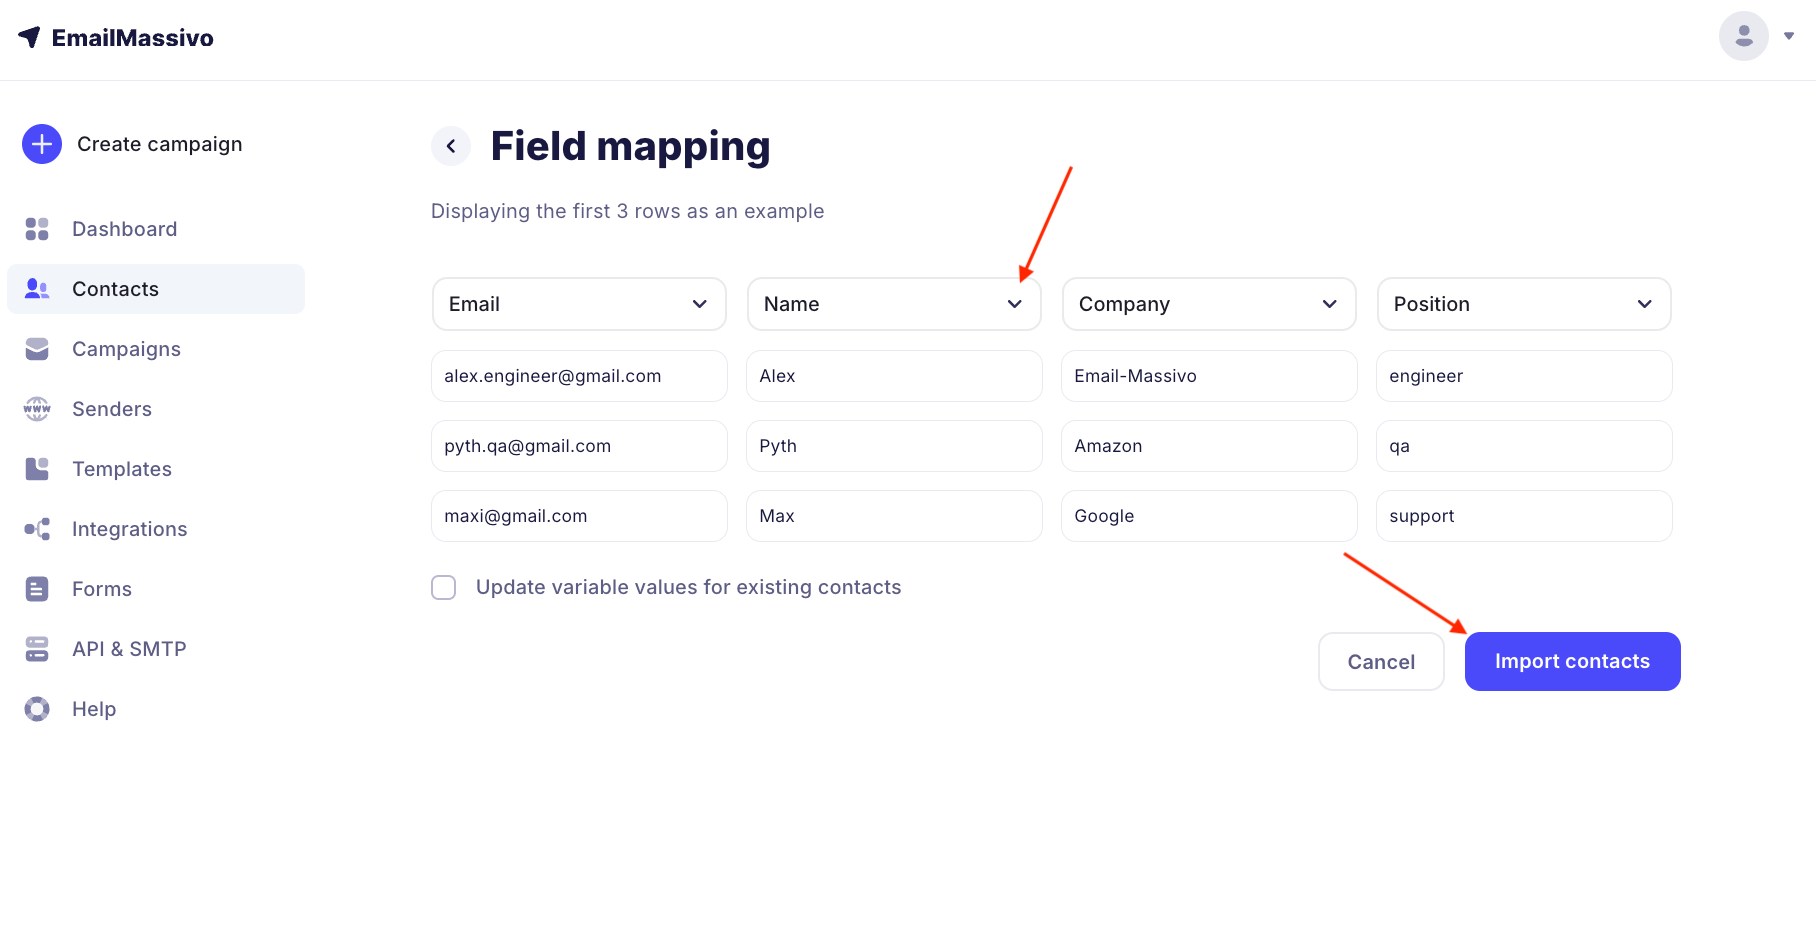
Next, you will be asked to match contact data with variables used in the EmailMassivo service. Variables are additional information about contacts in the contact database that allows you to personalize campaigns. For example, this is the contact's name, position, company name, phone number, and other data.
At this stage, define variables for each column from the file: click on the arrow in the top cell with the dropdown list, as indicated in the screenshot, and select a ready variable from the list or create a new one, then click "Import Contacts":
Important!
If you don't select anything, leaving the column with the value "Ignore", then data for this column from the file will not be imported.
Done! Contacts have been added to your account:

Important!
During import, at least one of two fields must be selected: email or phone. Otherwise, the database will not be imported.
If there were previously subscribers with the same email in the contacts, you can activate the option "Update variable values for existing contacts" – after import, all existing fields for the contact will have updated values.
¶ 4. Next Step
Congratulations! You have already connected and verified your domain, and also added your clients' email addresses to EmailMassivo. Now nothing stops you from moving on to perhaps the most interesting and pleasant part of the work – creating your first campaign.
Note:
Didn't find answers to your questions? Please use the detailed step-by-step guide for adding contacts in our Knowledge Base or contact the EmailMassivo user support team for help.