¶ Variables and campaign personalization
Campaign personalization is a way to send unique email messages that allows you to address each recipient by name, job title, or company name, as well as place other variable values in the email. To do this, you first need to upload this data (variables) to the contact list you will use for the campaign.
For more on how to upload a contact list, see the instruction.
¶ Checking Variables in the Contact List
A variable is the text in the email that changes depending on the values you set. When uploading contacts, in addition to the email address you can specify extra fields (variables), such as contact name and phone, and create your own variables and name them as you like.
Note:
Before creating a personalized campaign, make sure the variables specified in the contact settings are filled in correctly.
To view recipient information in the "Contacts" section, click on the contact you need:
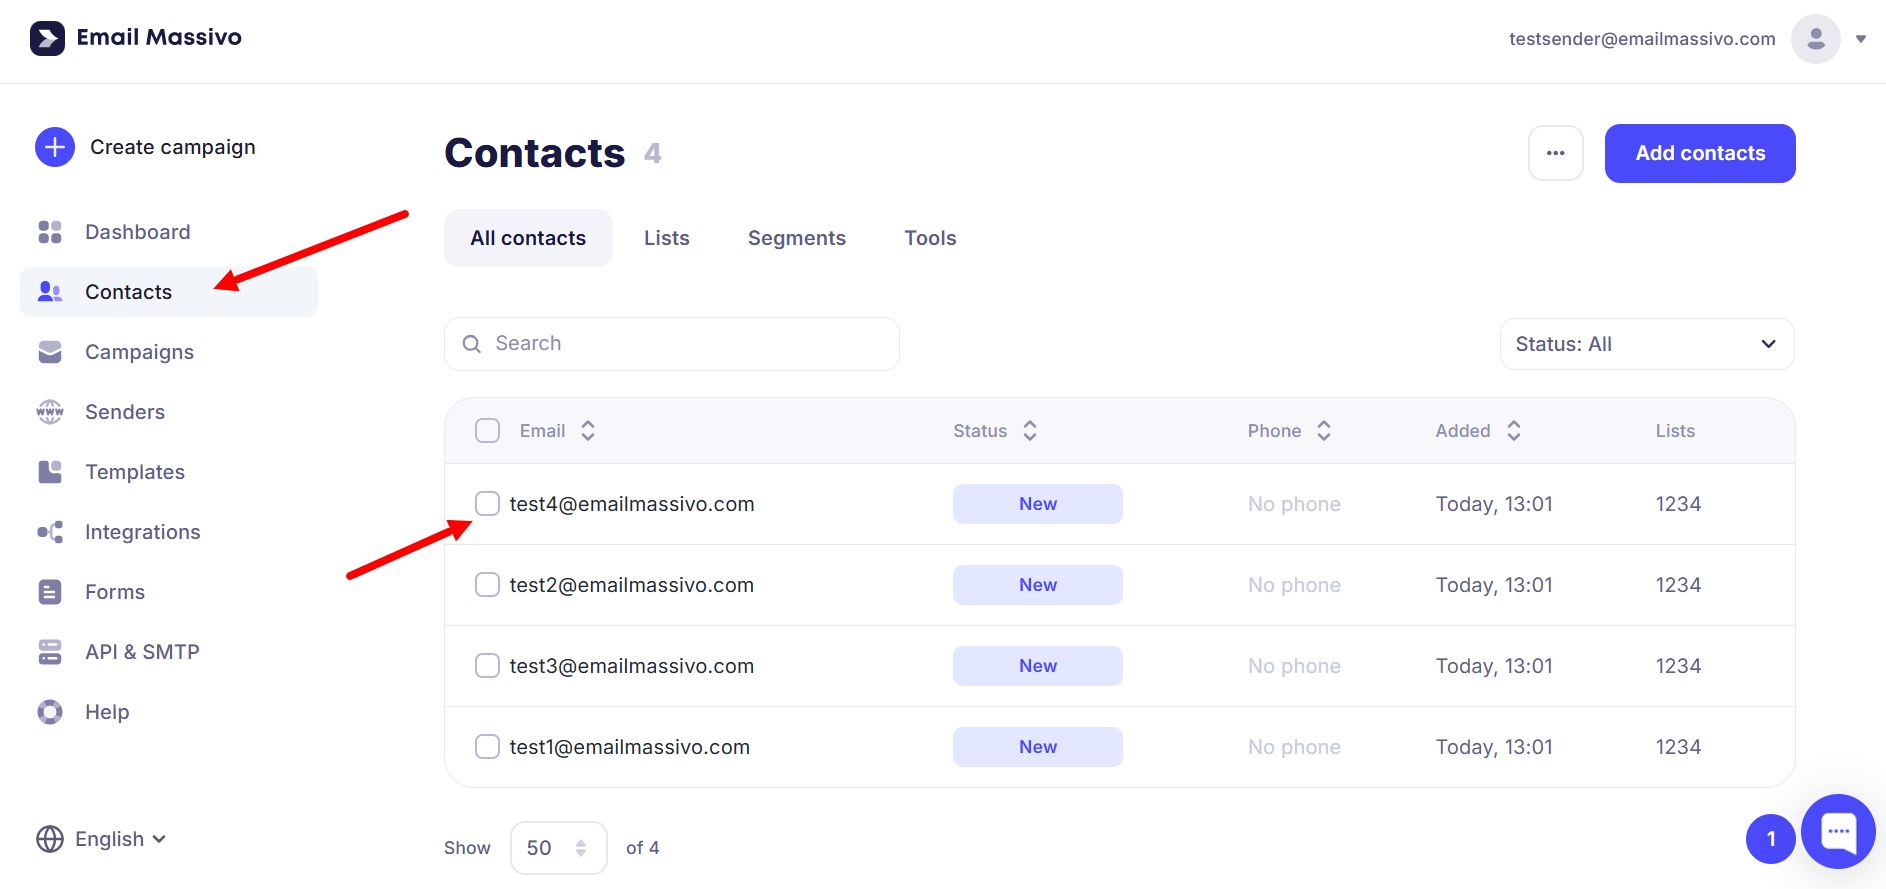
Here is an example of correct variable field filling:

Incorrect — when variables are empty or filled in a way that does not match the field meaning (for example, a word other than the person’s name in the name field):
If you do not select a variable, data from that column in the file will not be imported, and the email will show "null" instead of the variable.
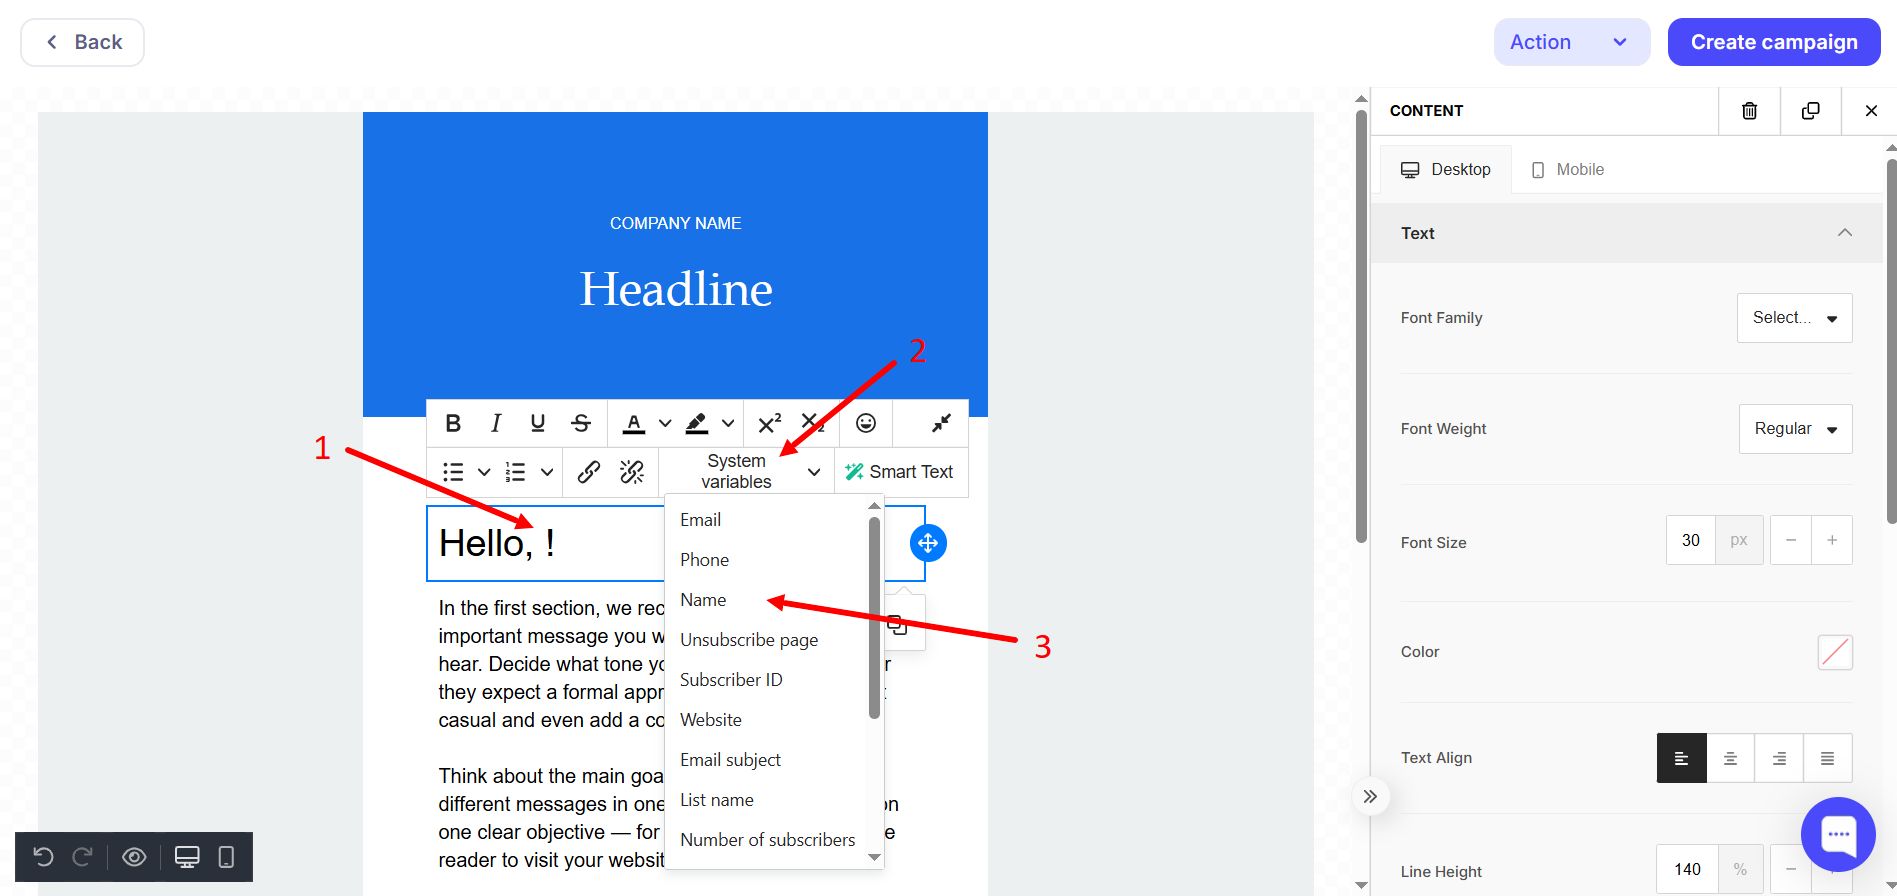
¶ Setting Up Variables in the Email Template in the Block Editor
You can now compose the email. Write your greeting to the recipient, then click the "Merge Tags" (system variables) dropdown and select "Name". Example:
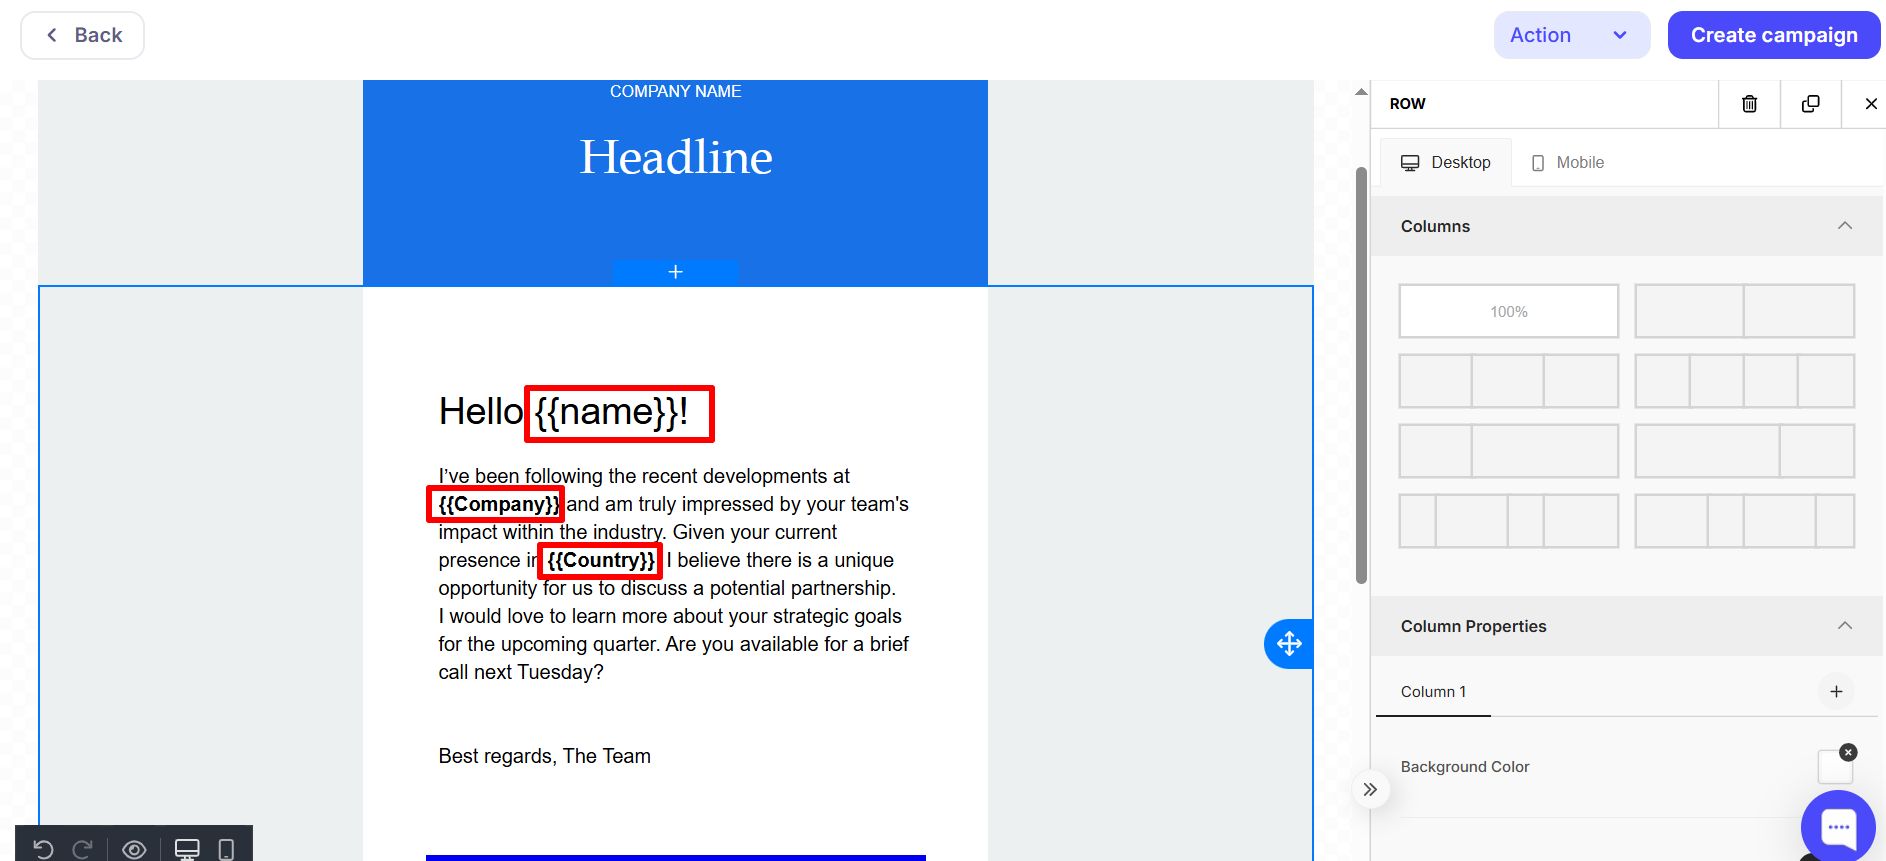
Similarly, place other variables in the text — those you uploaded when importing contacts or added later. The result might look like this, with variables highlighted in red for clarity:
When the email is ready, you can send the campaign. We recommend sending a test campaign to your own address first to verify that variables are filled in correctly.
¶ What a Personalized Email Looks Like
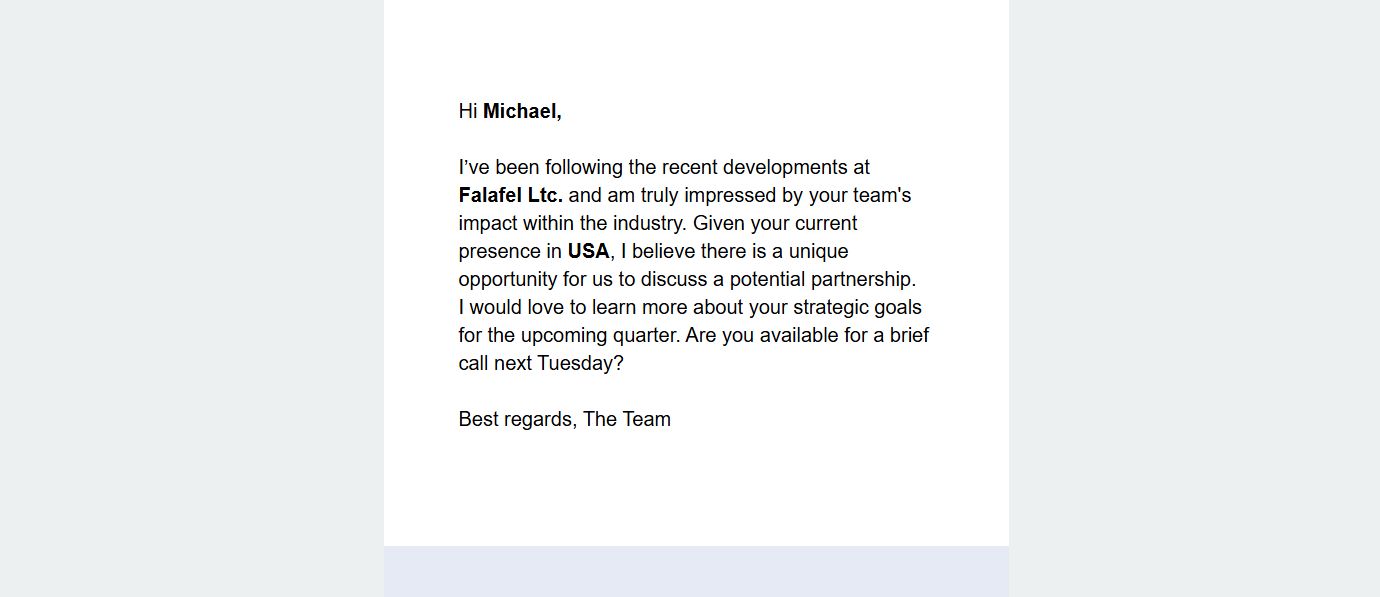
Each contact will receive an email addressed to them. When all variable fields in the contact settings are filled in correctly, the email will look like this:
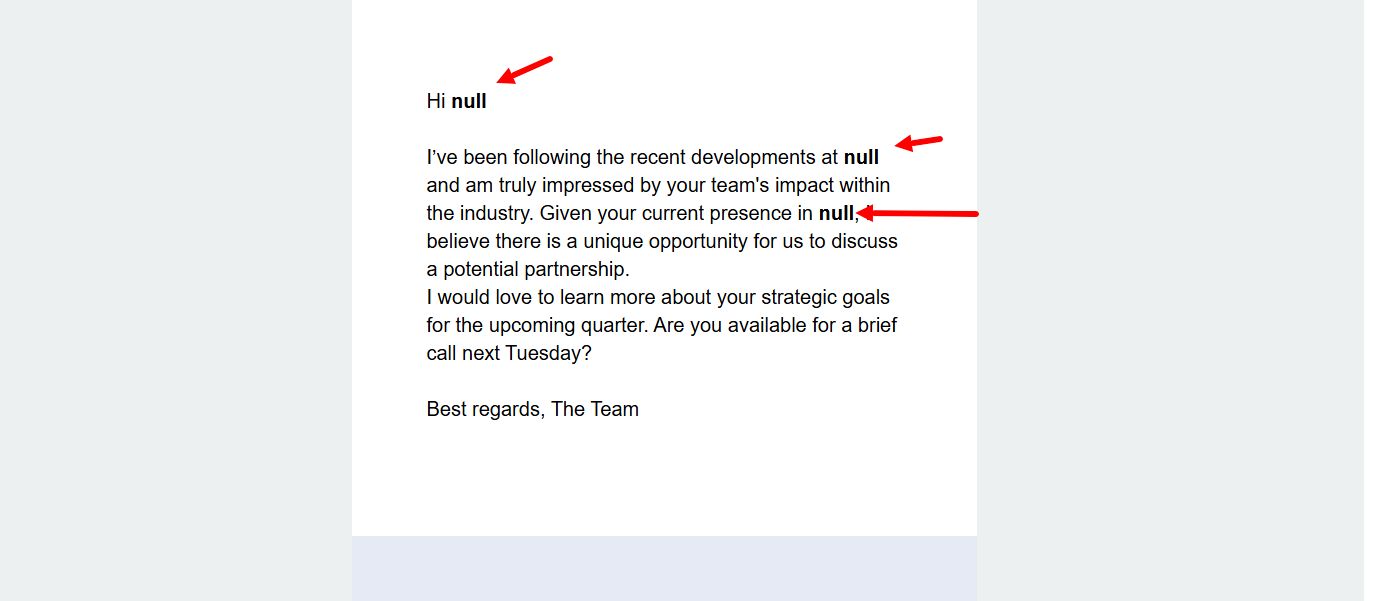
If variable fields in the contact settings were left empty or filled in a way that does not match the variable name, the email will look like this:
So before sending to potential customers, check that variables are filled in.
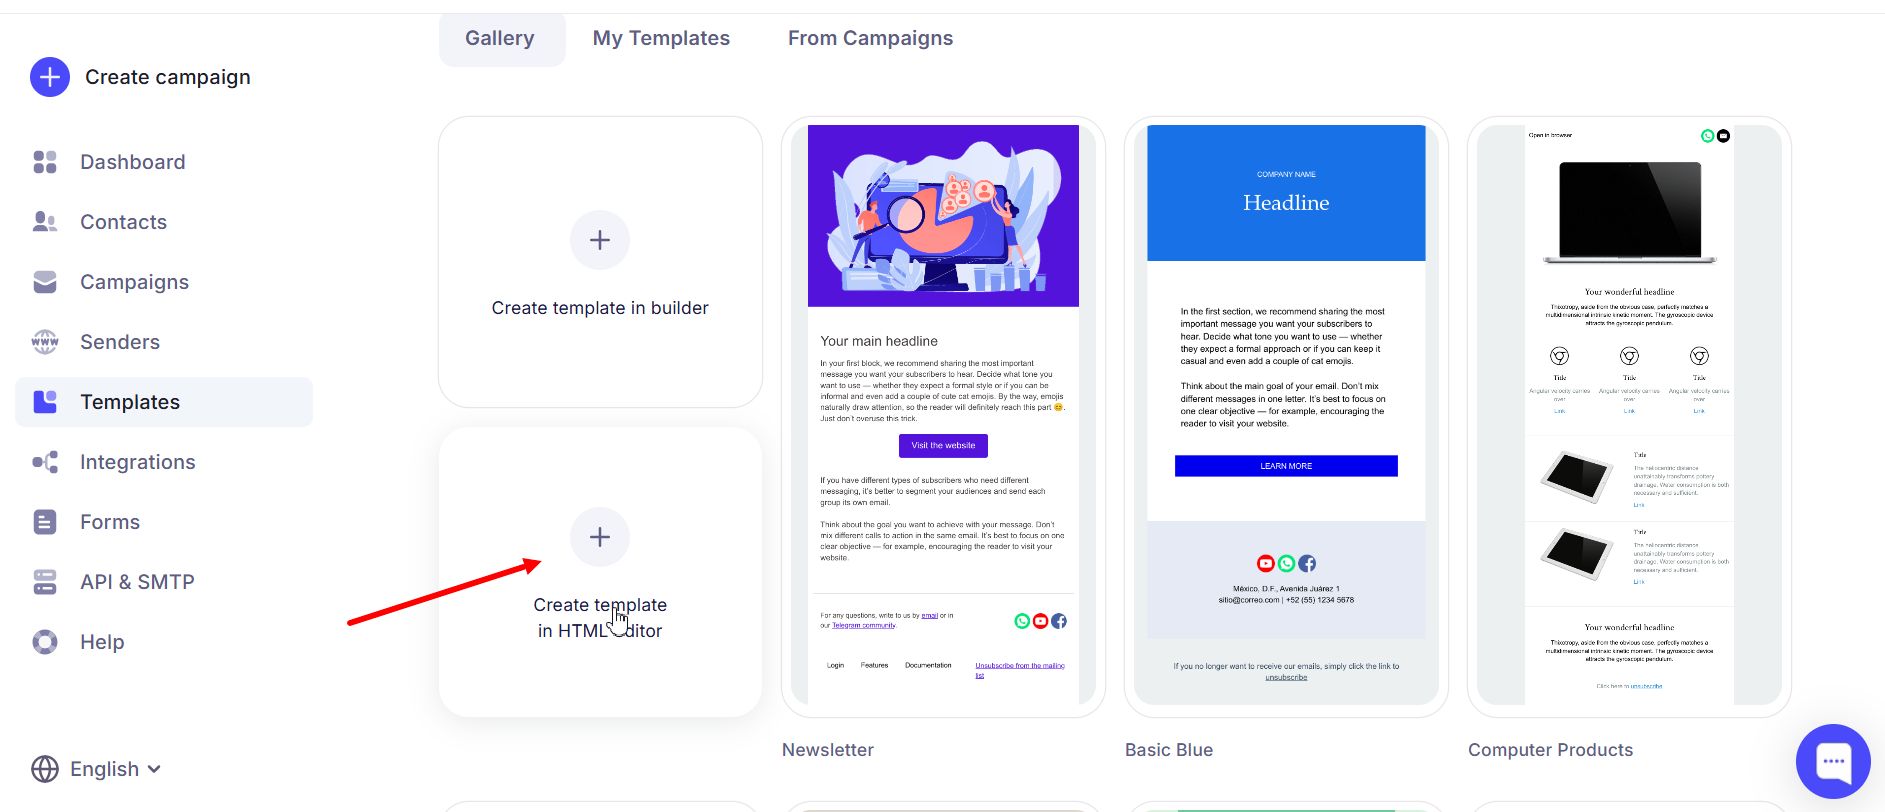
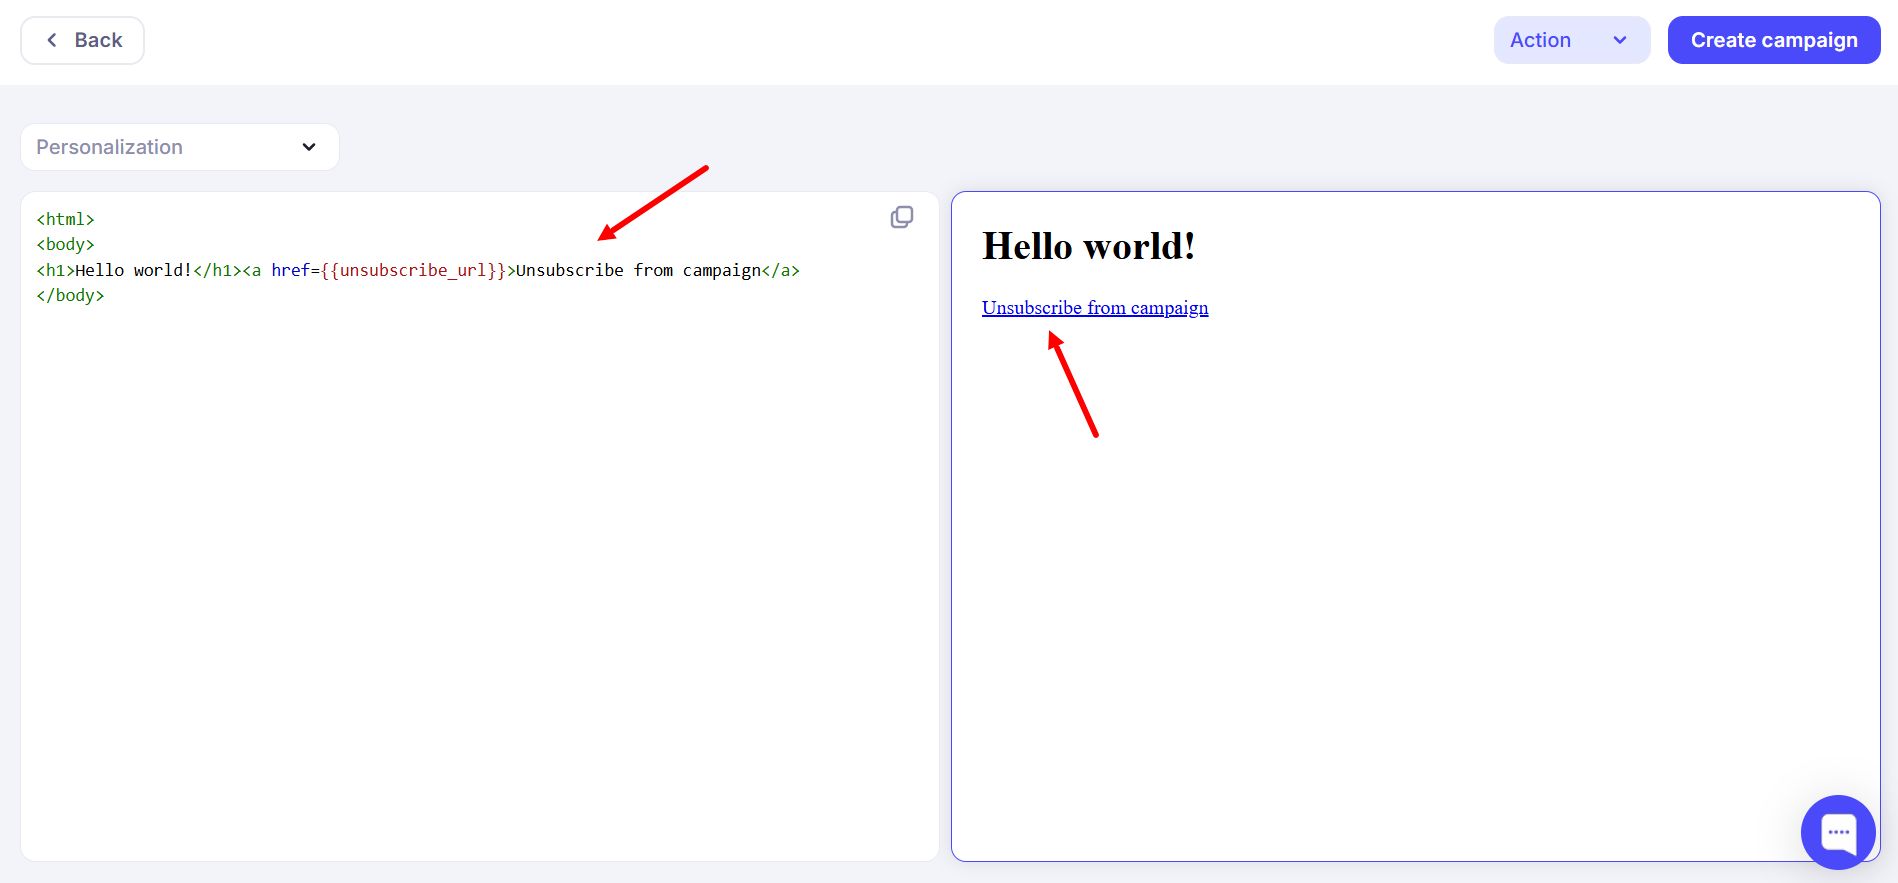
¶ How to Add Variables to an HTML Template
If you need to use an HTML template, when choosing a template from the gallery click this button:
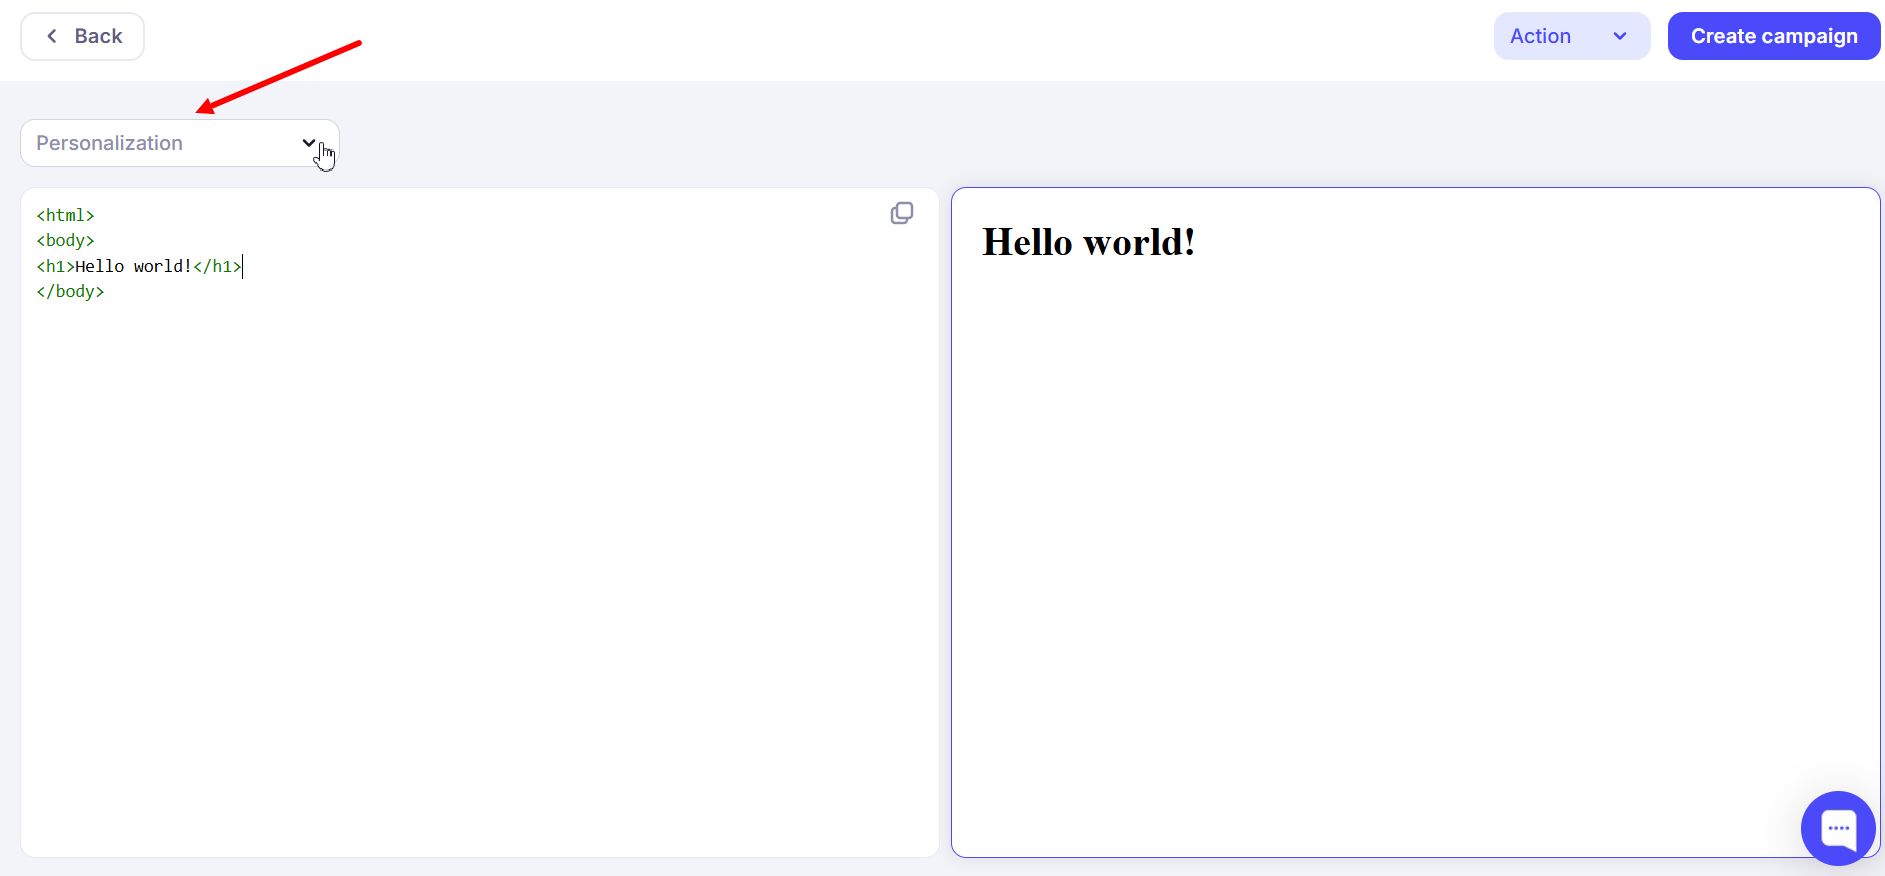
Then place the cursor where you want to add the variable and click the selector (dropdown).
Select the variable you need from the list. For example, "Unsubscribe Page". This variable is required; without it the email will not pass moderation:

You will then get the variable code in the template:
¶ List of Available System Variables
The block editor provides the following system variables by default. Here they are with a short description:
- {{email}} — contact email address
- {{phone}} — contact phone number
- {{name}} — contact name
- {{unsubscribe_url}} — unsubscribe link for the contact
- {{subscriber_id}} — subscriber ID, a unique number for each subscriber
- {{host}} — sender’s mail domain (e.g. gmail.com, mydomain.com)
- {{sp_subject}} — subject of the current email
- {{sp_listsubscribers}} — number of subscribers in the list
- {{sp_listname}} — name of the campaign list; if there are several lists, all are shown
- {{current_year}} — current year
- {{date}} — date at the time of sending
- {{optin_date}} — date the recipient subscribed; if the contact was imported from a file or added manually, the import/upload date is used
- {{webversion}} — web version of the email (view in browser)
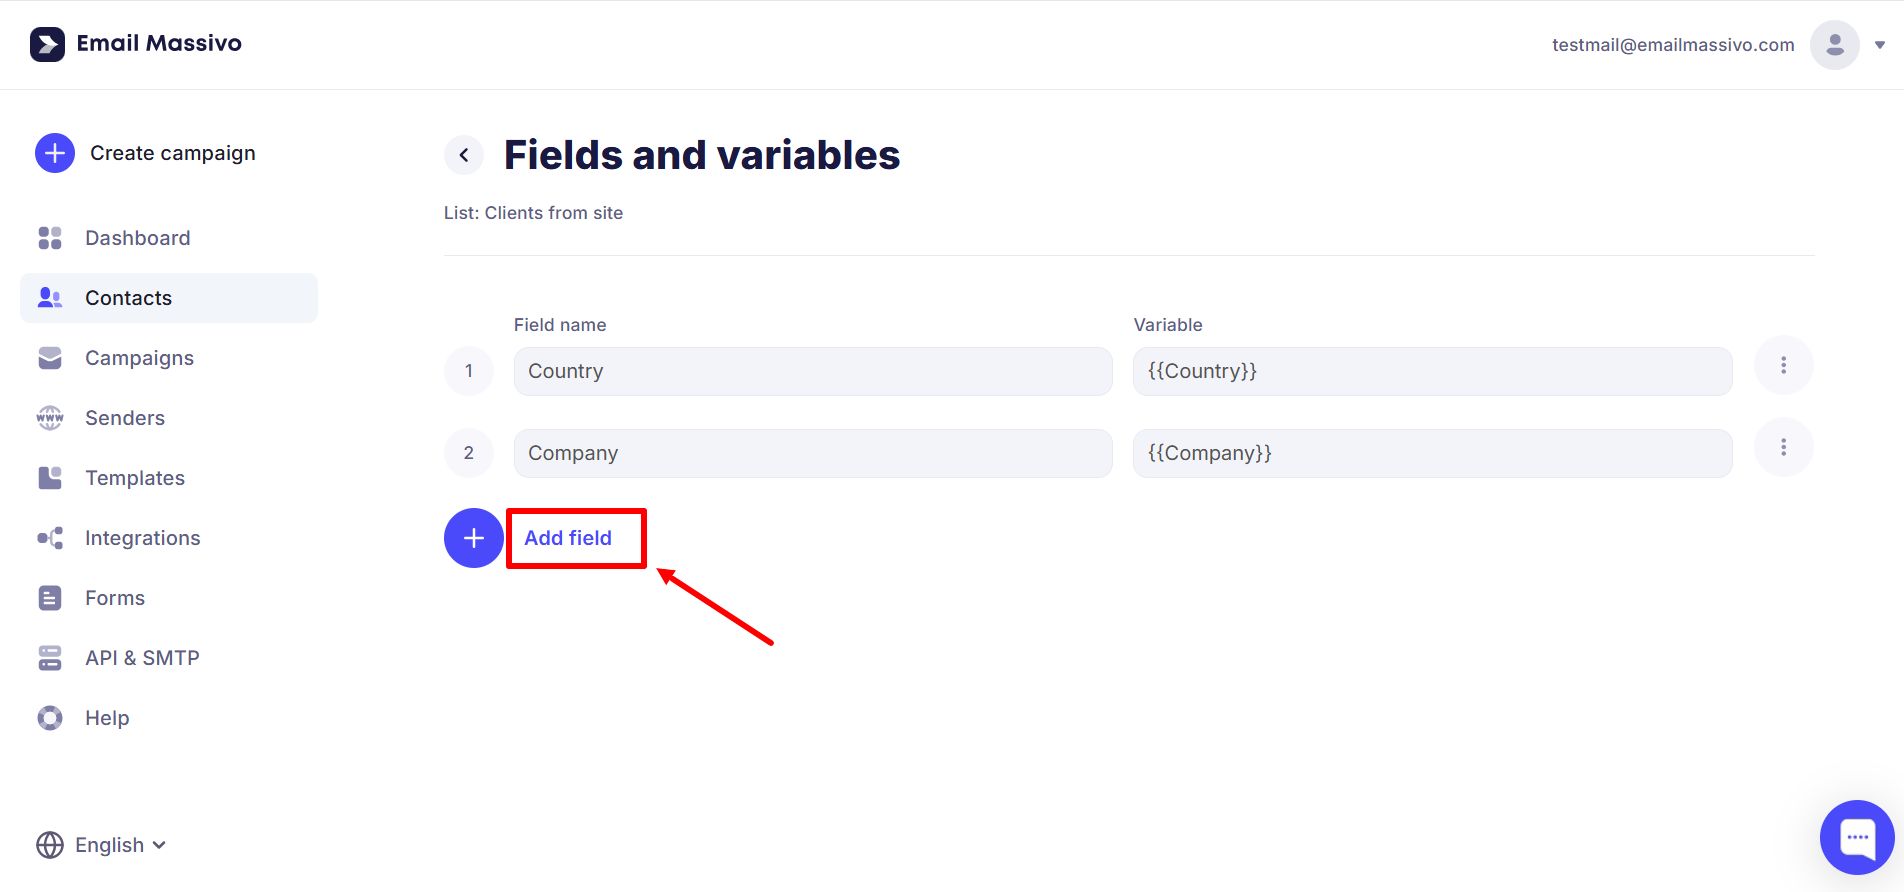
¶ How to Configure Fields and Variables in a List
Go to "Contacts" → "Lists".
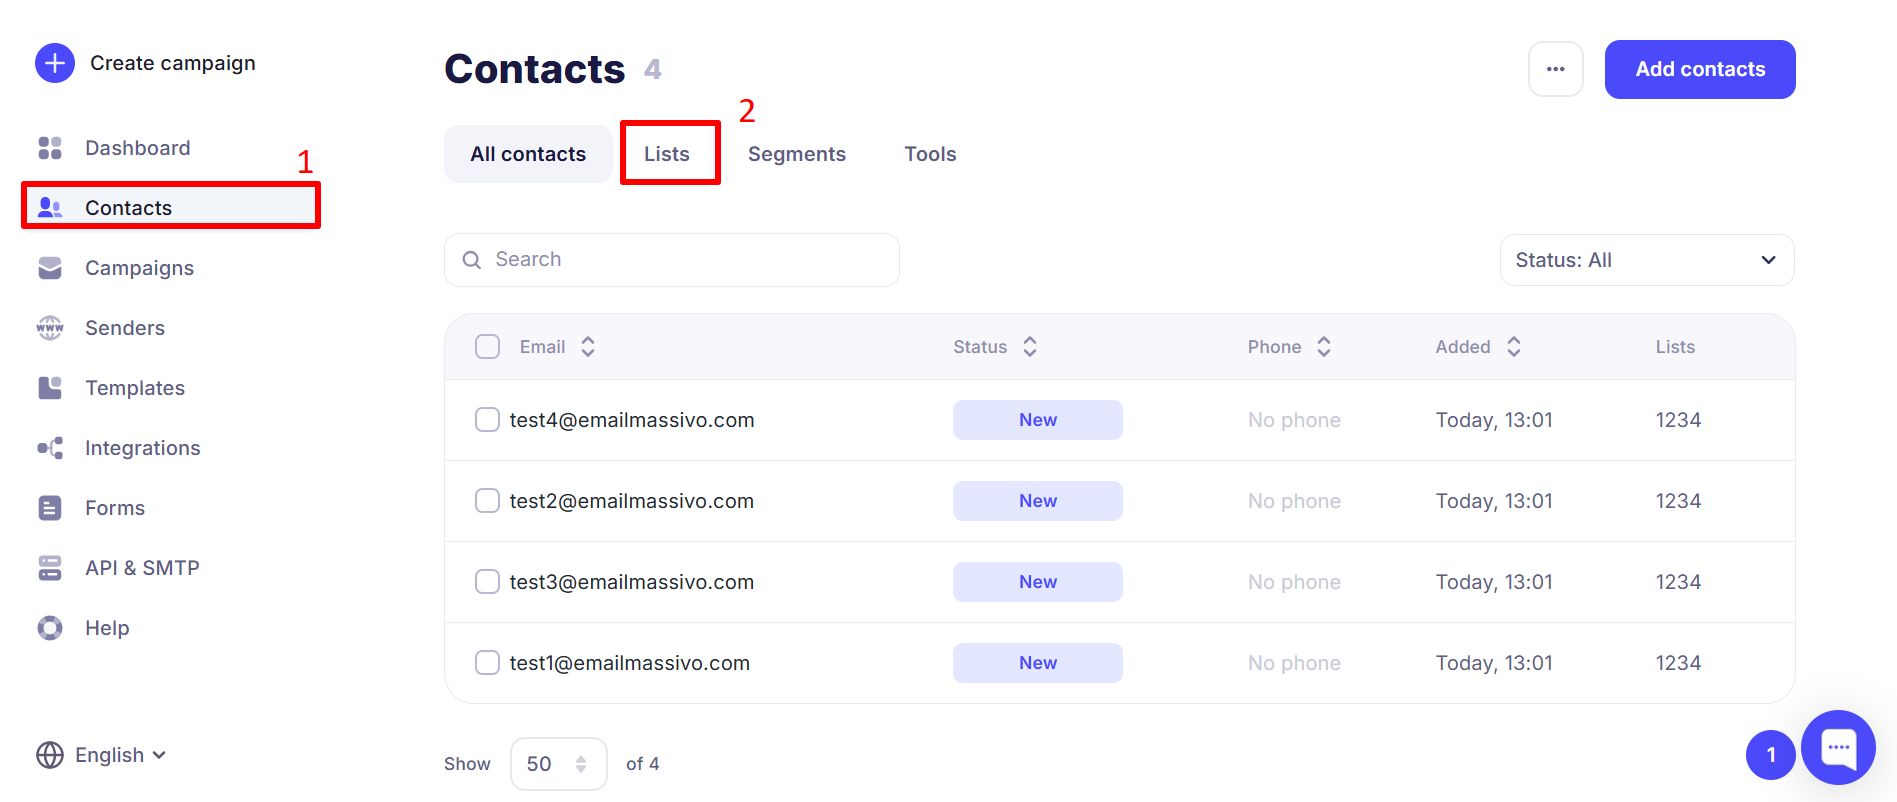
Open the list you need and click the three dots.
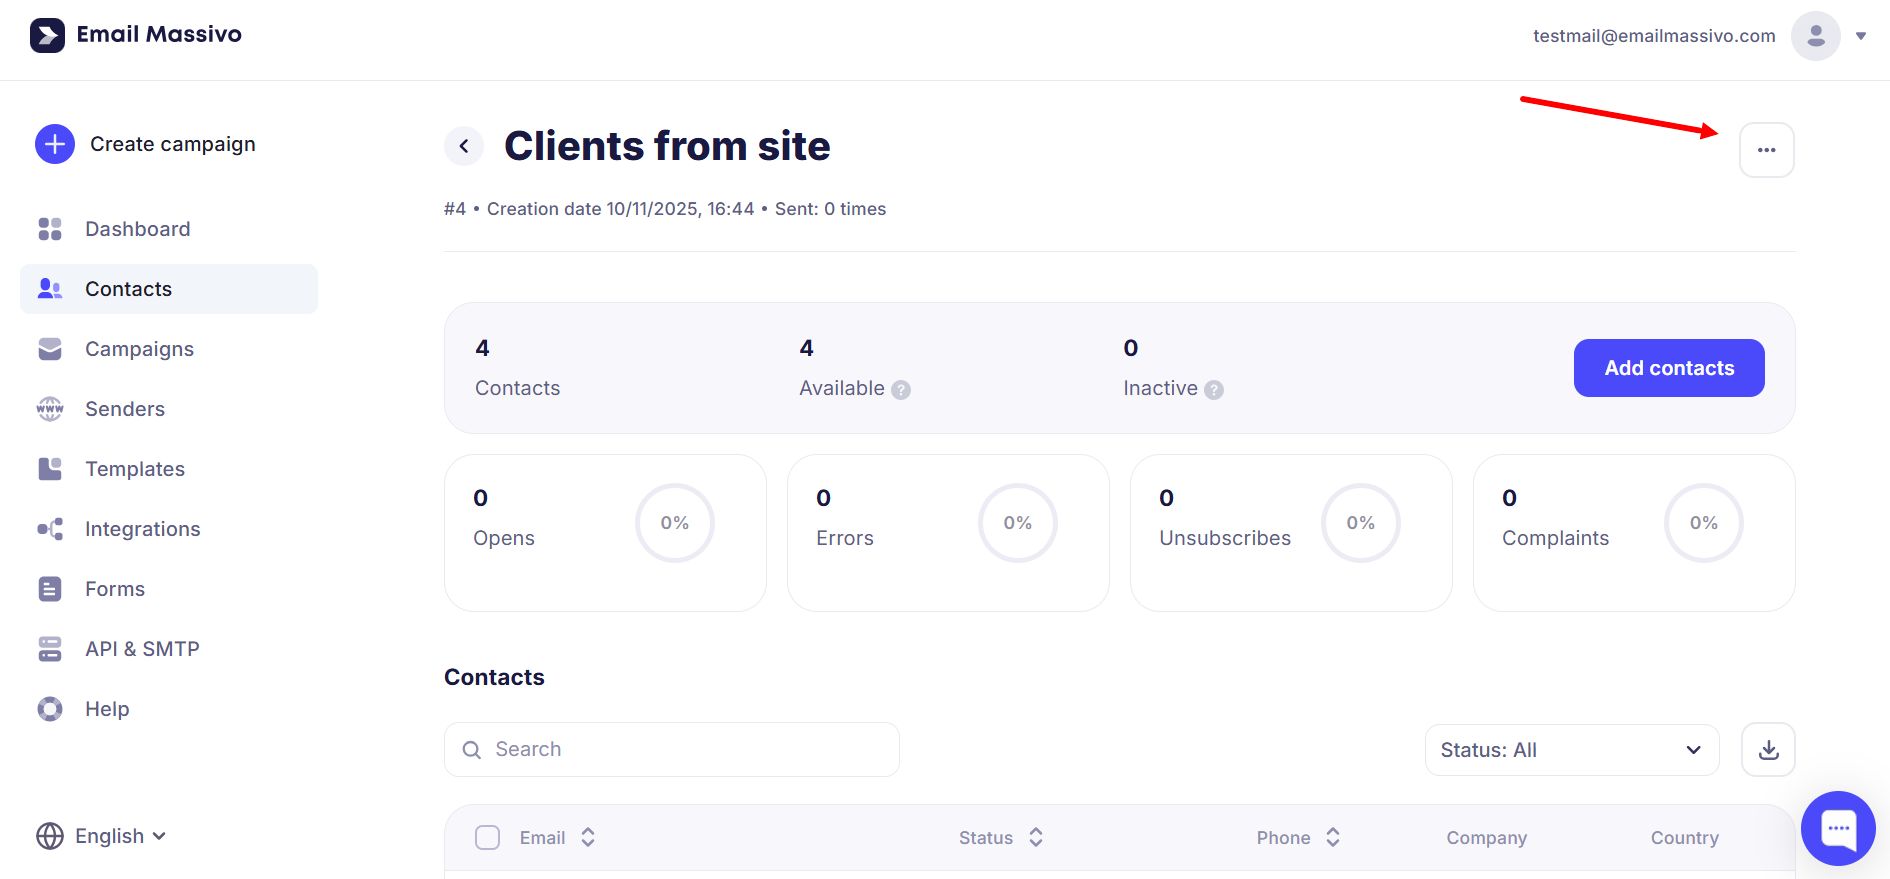
Select "Configure fields and variables".
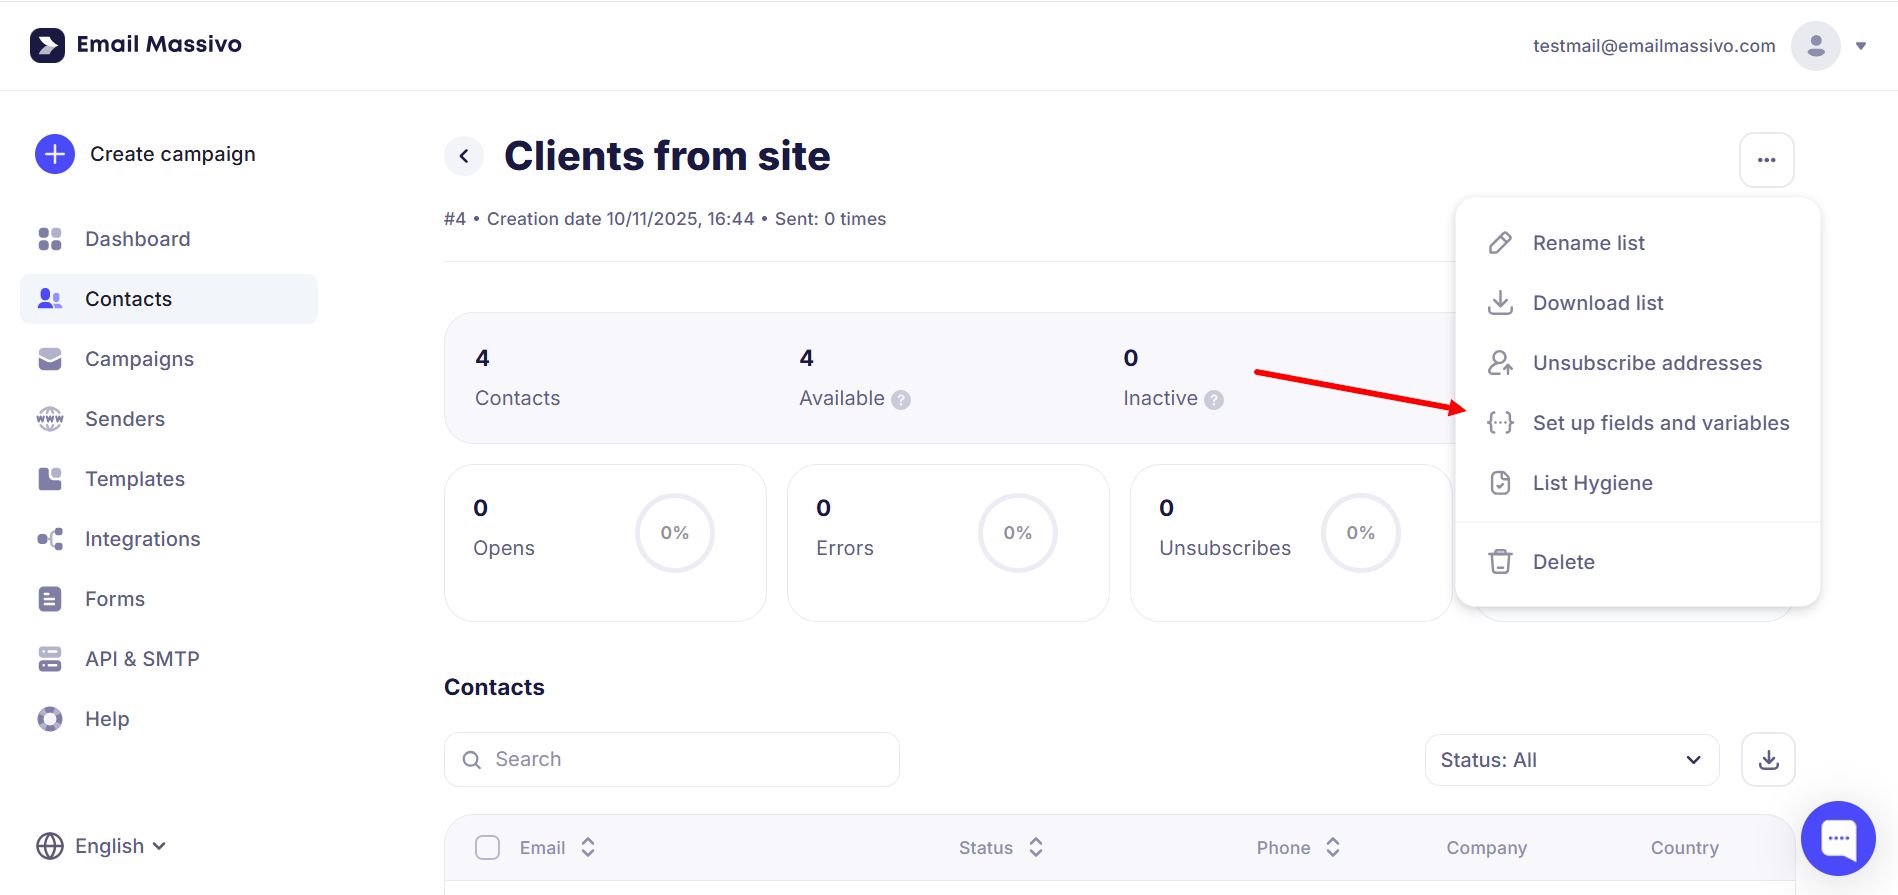
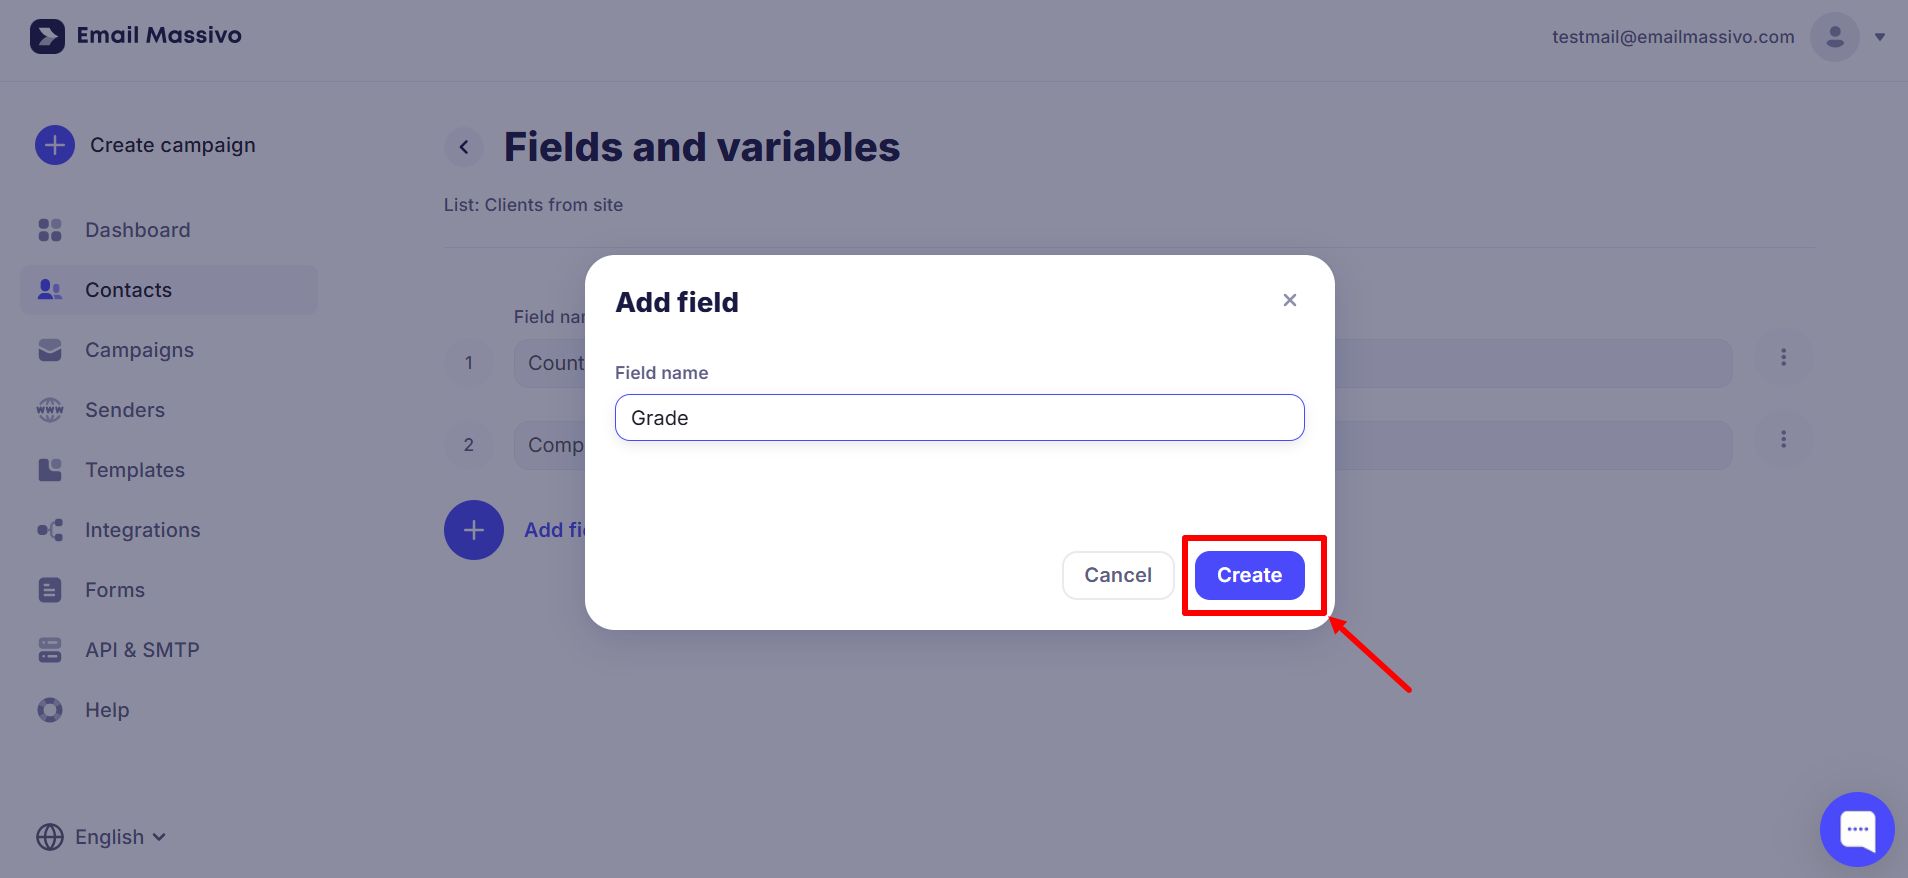
Add a new field, enter a name, and click "Create".
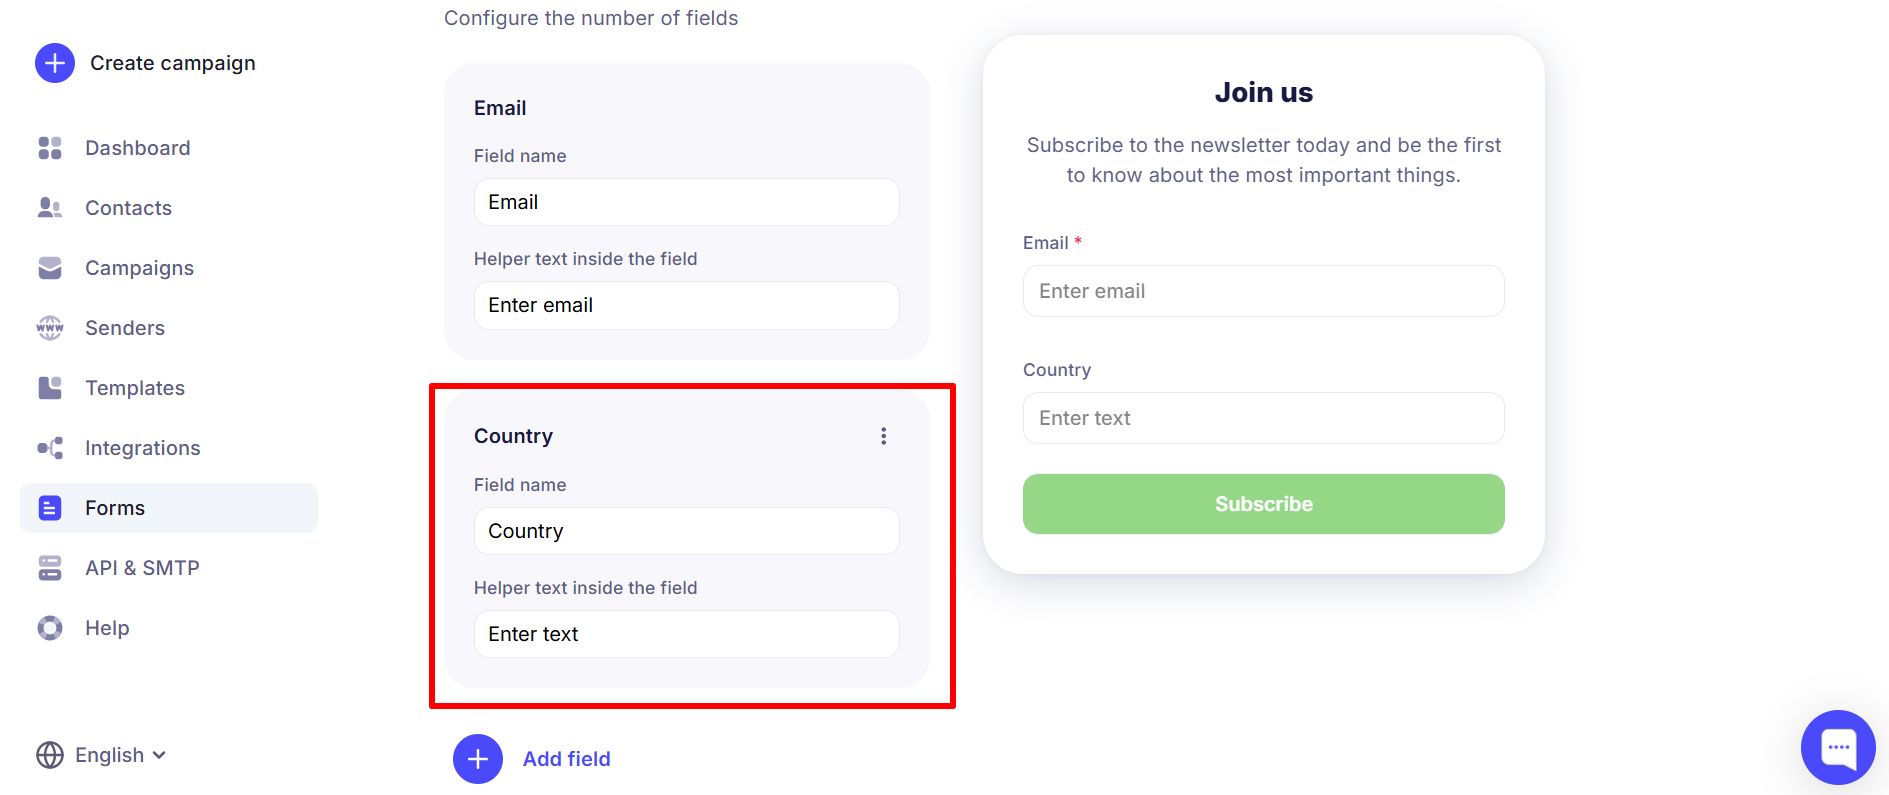
¶ Adding Custom Fields to the Signup Form
When creating a signup form you can add your own form fields. On the second step, click "Add field".
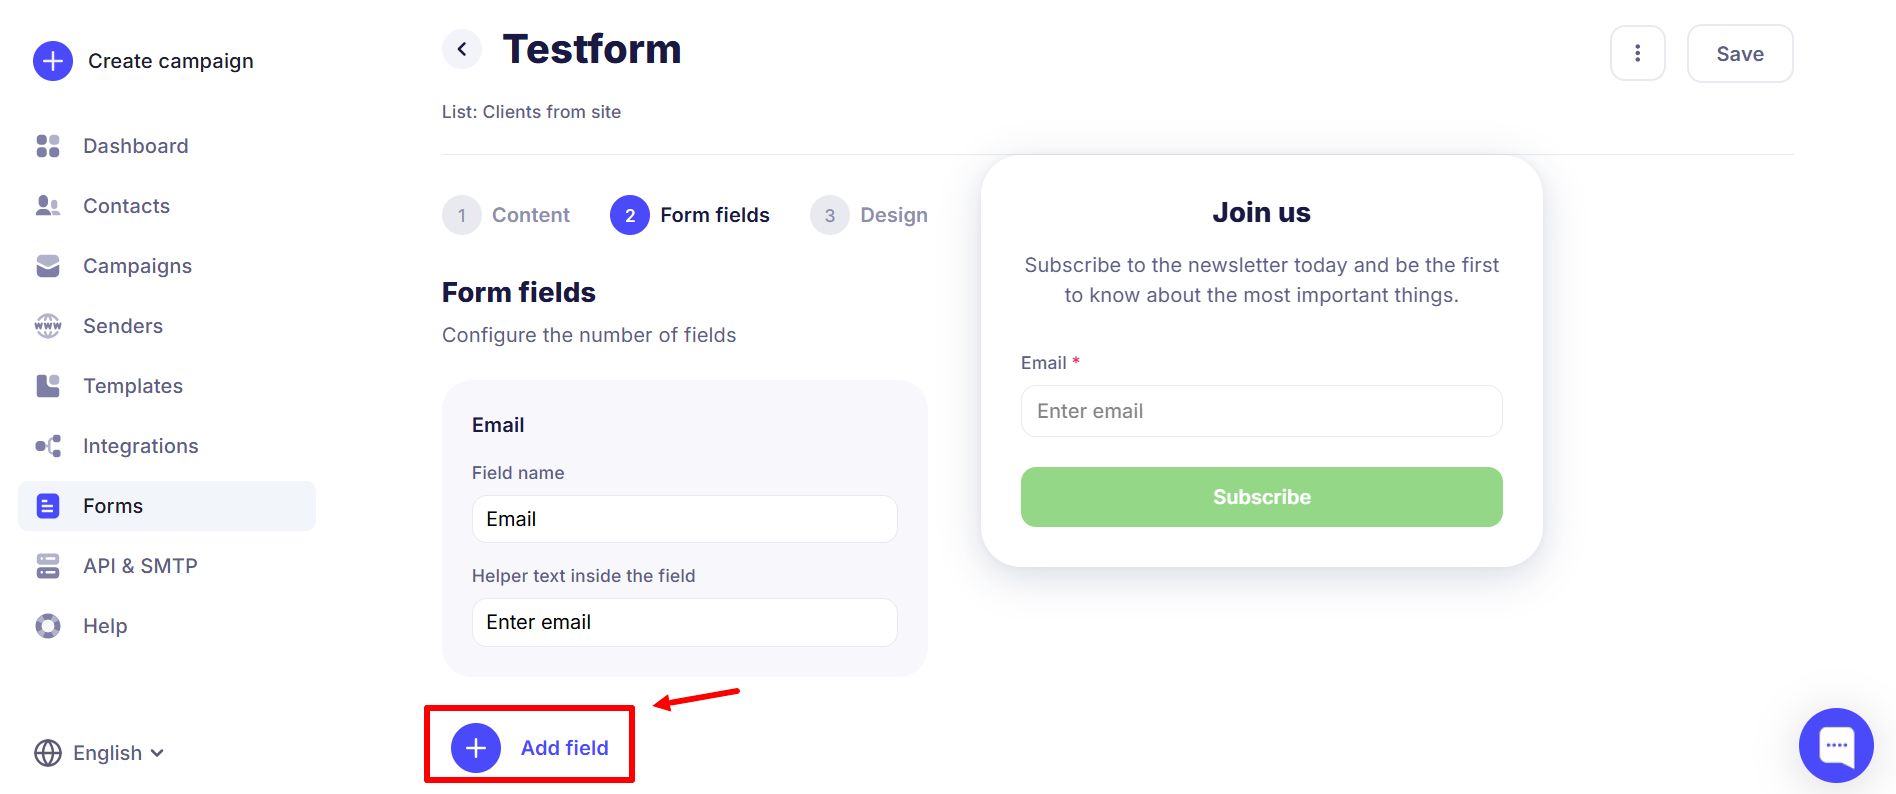
Select the field you need.
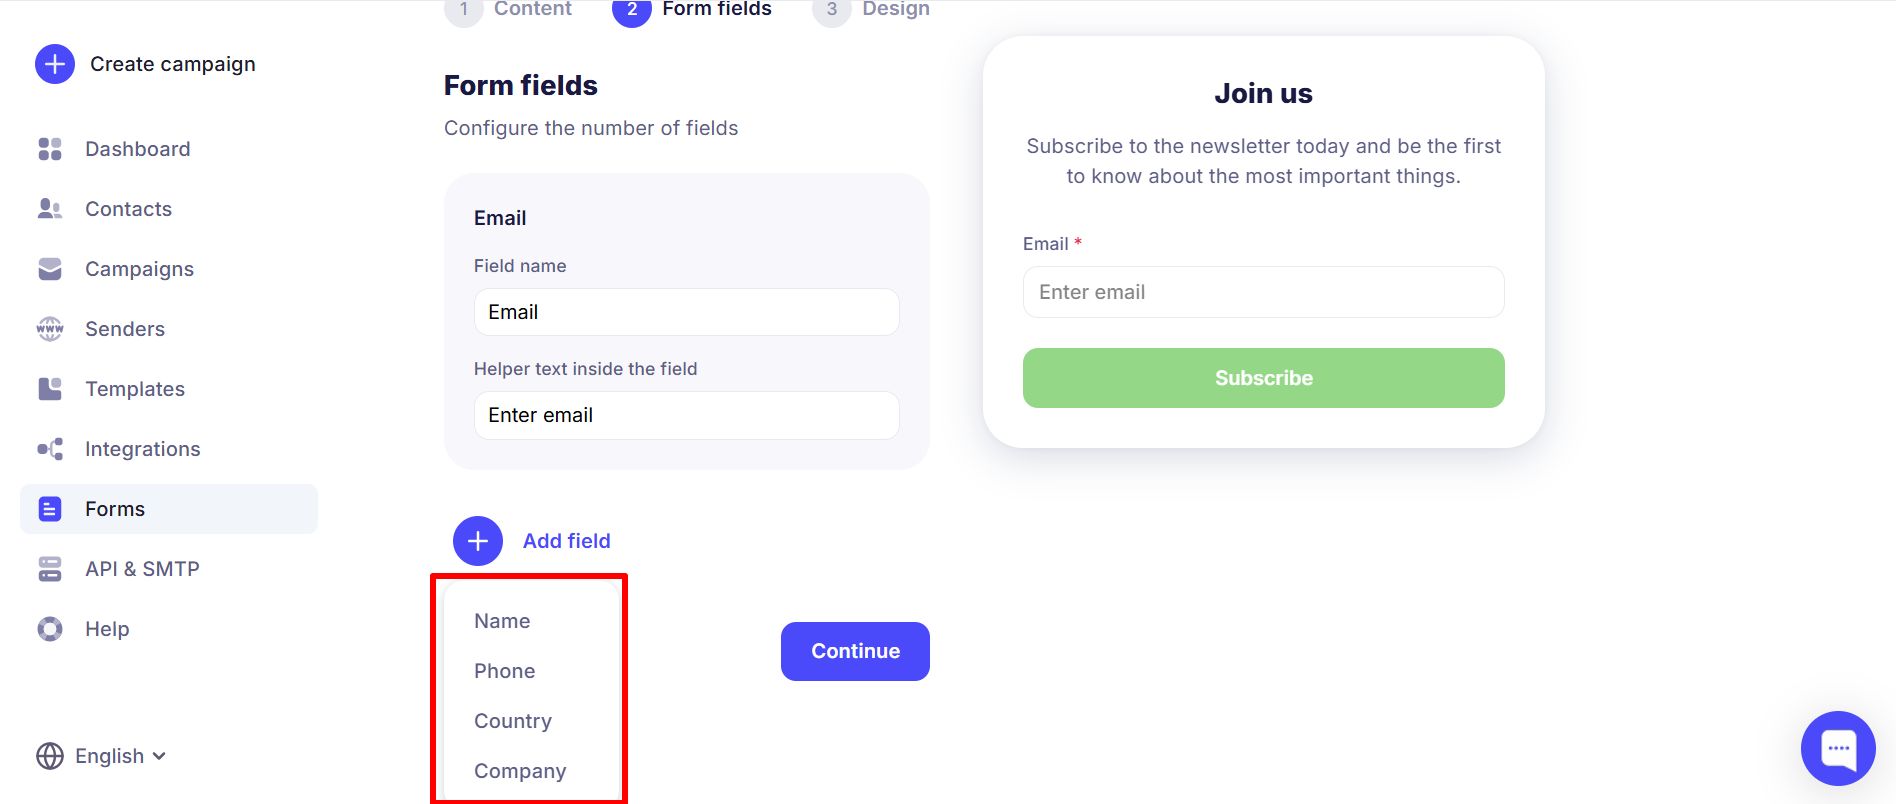
Done!