¶ How to Create Your Own Template? Working with Email Builder
¶ Ways to Create a Template
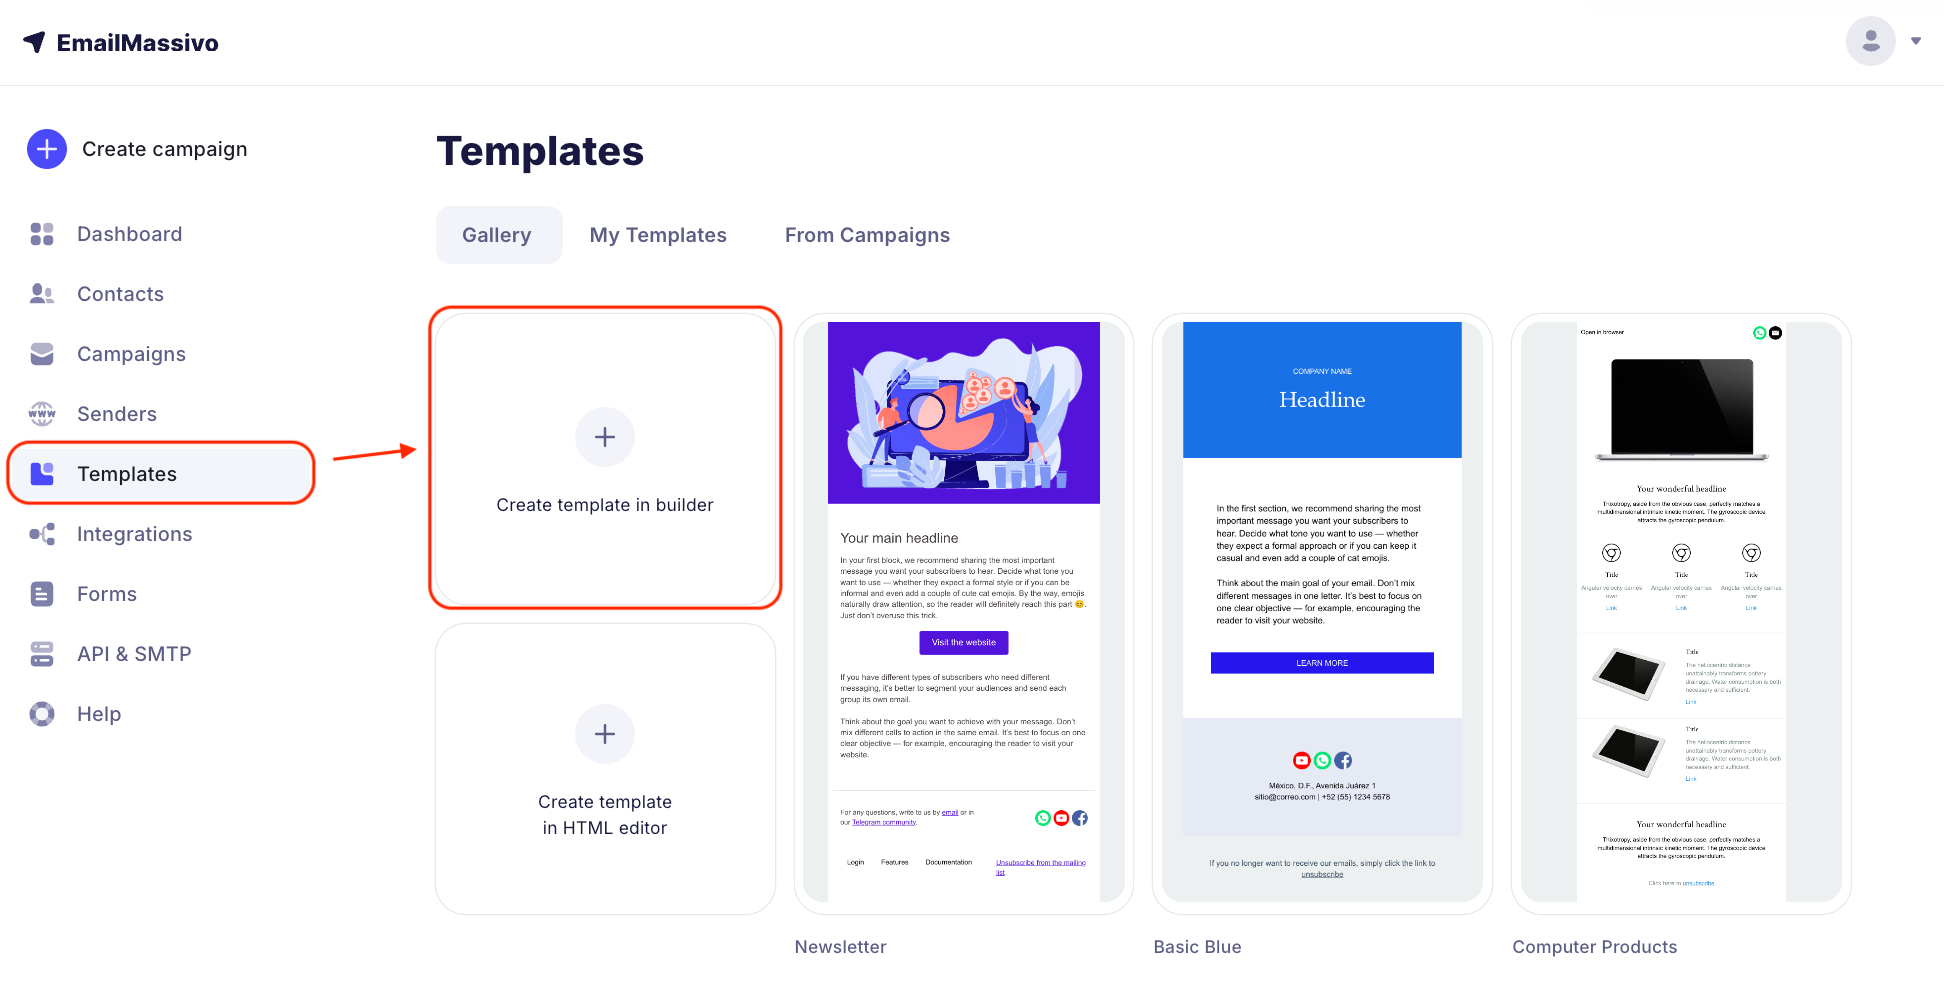
You can add a template to EmailMassivo in three ways:
- choose a ready-made template from the gallery;
- create a new template using the block builder;
- add your own template in the HTML editor.
The EmailMassivo block editor has a number of advantages:
- to create an effective email, you can add any block and layout element by simply dragging it with your mouse from the ready-made builder elements;
- you can easily edit all elements, changing colors, styles, sizes and other parameters;
- no special knowledge or skills in working with HTML code are required;
- You can immediately set up a separate mobile version of the email.
Note:
You can choose an existing template from the gallery and make changes to it. Ready-made templates of different themes will allow you to create a quality and beautiful email by simply replacing the text.
Let's look at how the builder works using the example of creating a template from scratch. Go to the "Templates" section and click "Create Your Template".
¶ "Content" Section
In the toolbar on the right in the "Content" section, elements that you can add to the email will be available:
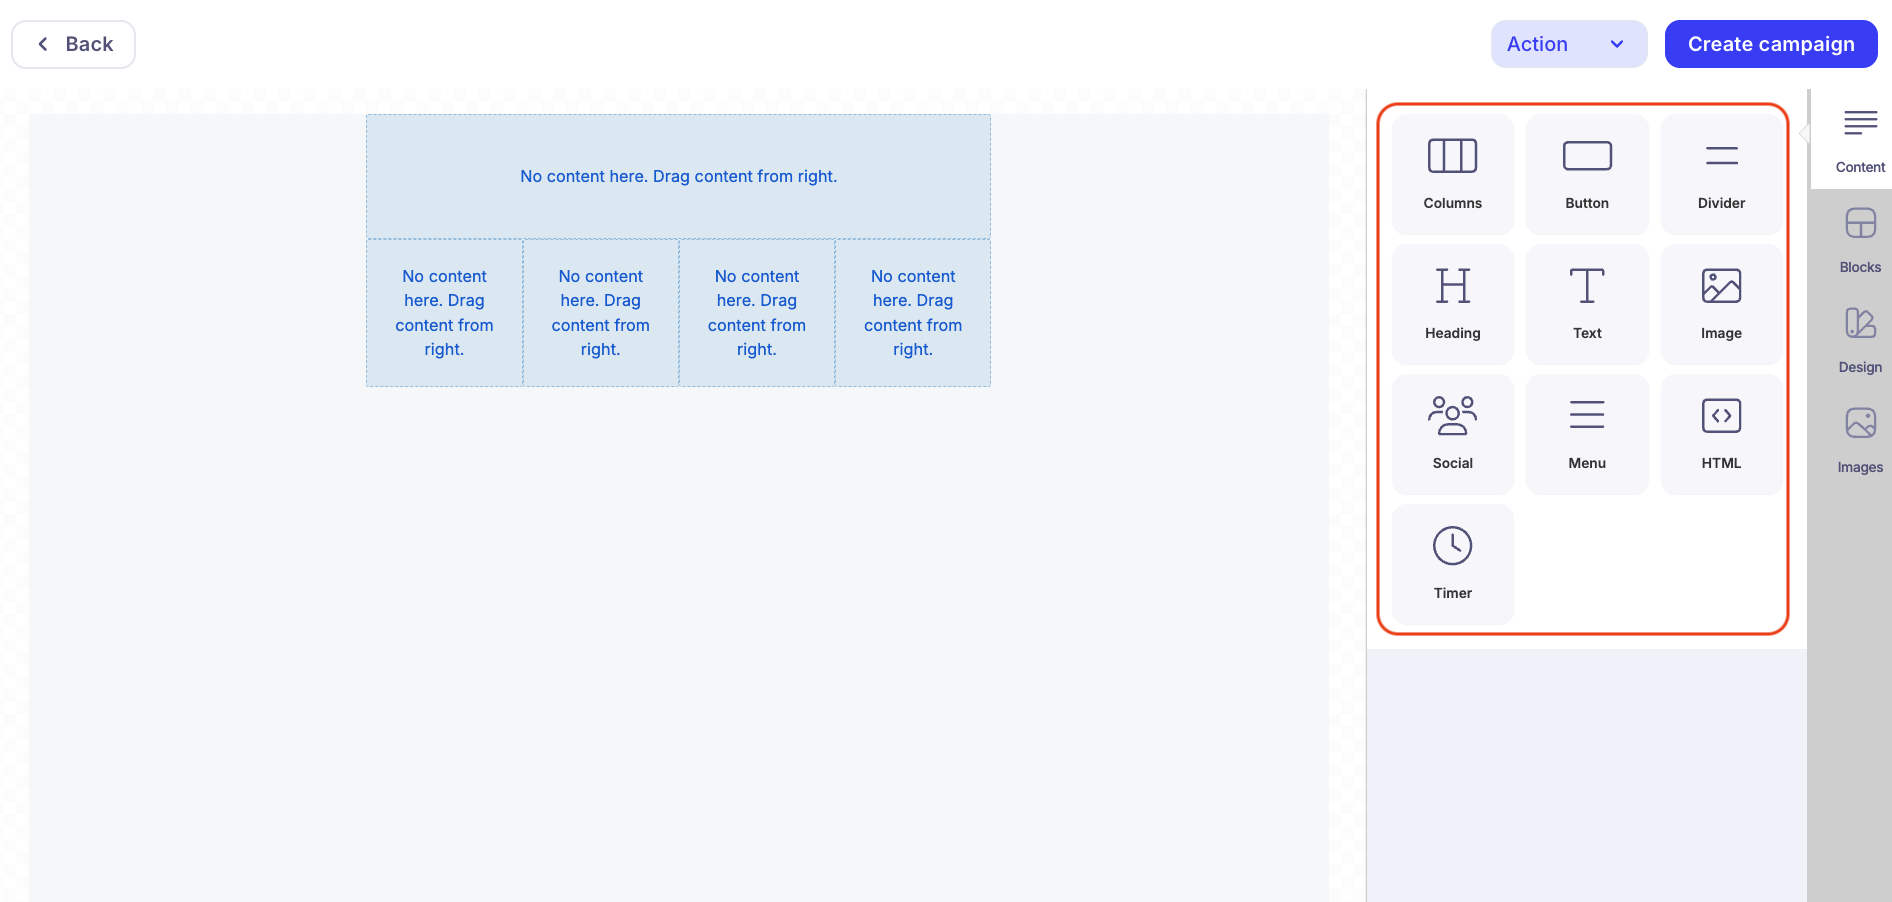
Let's look at each of them.
¶ Columns
This element is necessary to divide the content of your email into several columns or place two elements in one row at once – for example, two buttons or two images in one row. Columns help organize the structure of the email.
To add an element to the workspace, drag it from the toolbar. Then, to change the number of columns, click on the element in the workspace, after which its parameters will open, where you can select the desired number of columns, as well as configure their properties:
¶ Heading
You can use this element to organize and graphically structure information in your email.
¶ Text
Use this element to fill your email with meaning and convey important information to the recipient.
¶ Image
You can add photos to the email from your computer, upload them by link, or choose one of many free stock images from the library of connected services Unsplash, Pexels, Pixabay.
¶ Button
This element is necessary to call recipients to action, for example, to go from the email to your website, page on social networks or messengers, send you an email or call by phone. The list of actions is available in the element parameters, in the "Actions" section.
¶ Divider
A divider will help you set a visual boundary between other elements, for example, between two paragraphs of text. You can configure the width, color, line type and divider padding sizes.
¶ HTML
The "HTML" element allows you to insert your own html code into the email body. If you need some special functionality in the email that is not available in our service, you can integrate it using code. If there are many such elements in your email, it might be more convenient to create it entirely through a separate HTML editor.
¶ Menu
The "Menu" element functionality is similar to the "Button" functionality. You can create several menu items and assign an action to each item: following an external link, sending an email or making a phone call.
¶ Social
Use this element to place icons with active links to your profiles and accounts in social networks and messengers in your email.
¶ Timer
Using this element, you can visually show and tell about an offer that is time-limited. The timer will dynamically change information in the email for each recipient until the date you specify.
¶ "Blocks", "Text" and "Images" Sections
In addition to the "Content" section, which contains the elements listed above, the toolbar also has "Blocks", "Text" and "Images" sections.
Let's look at these sections.
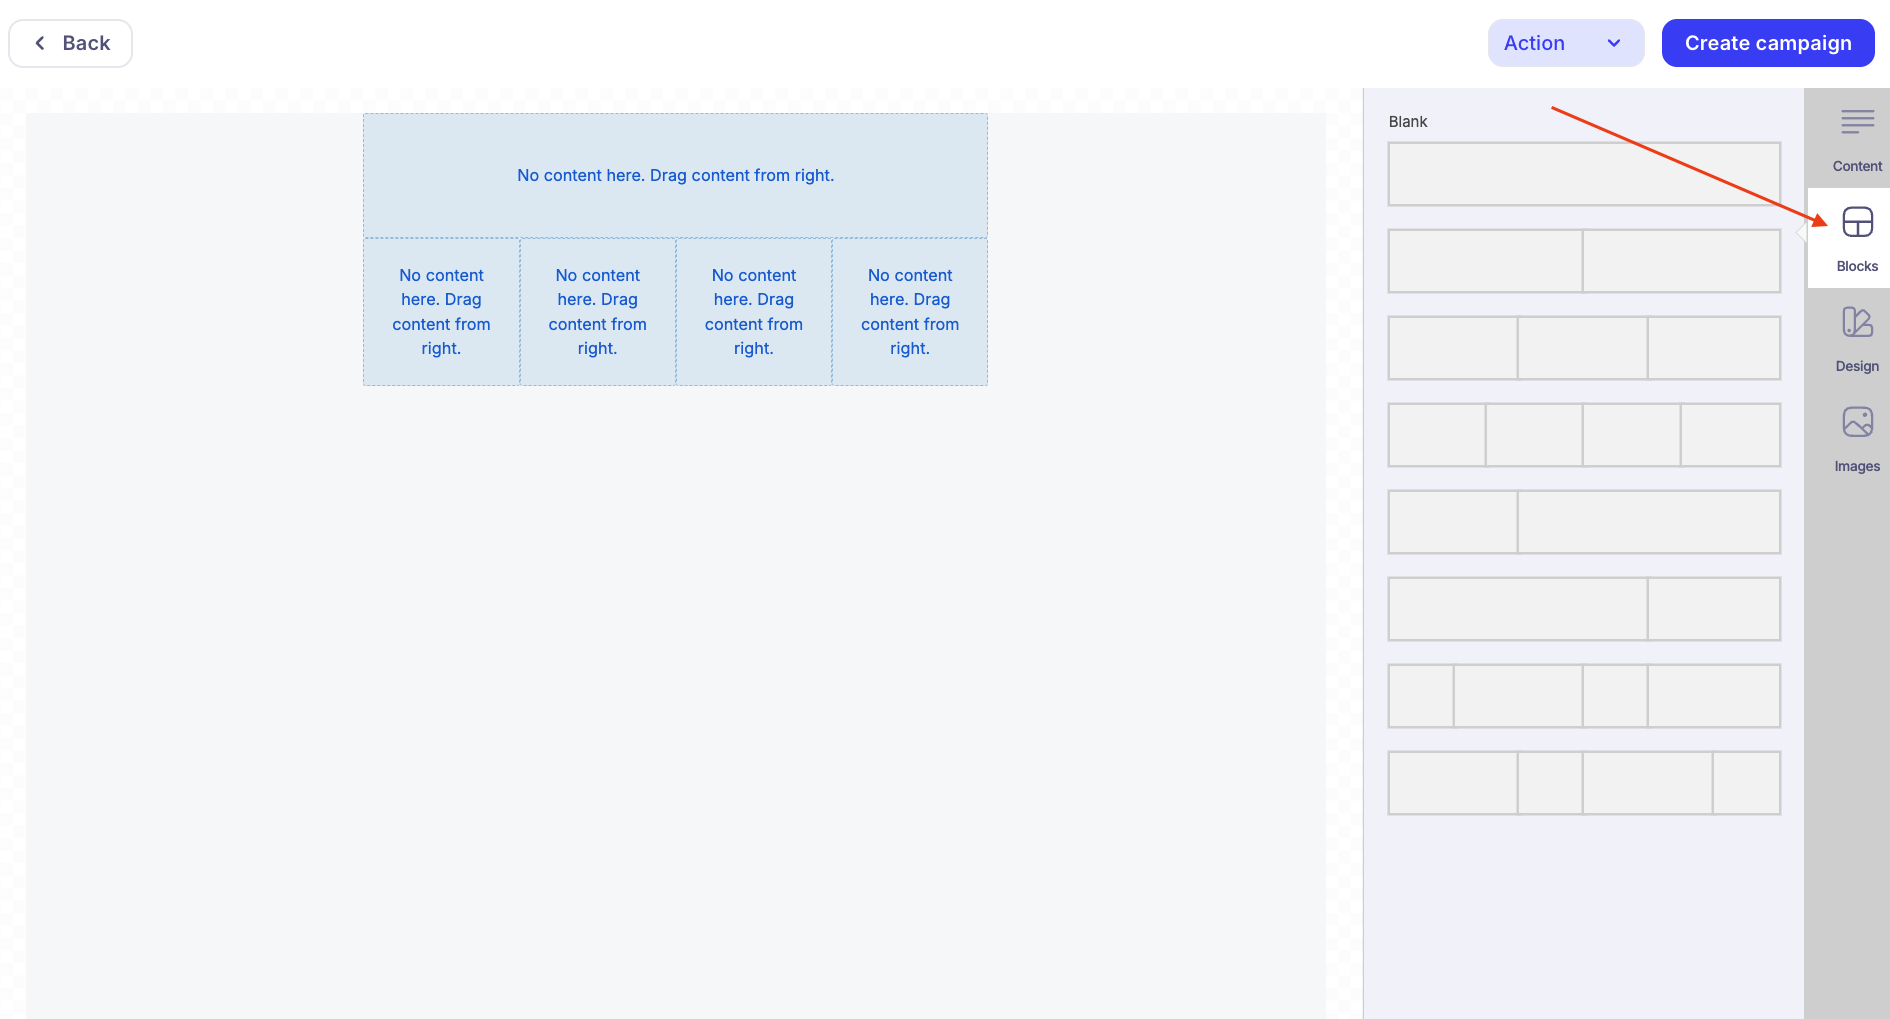
¶ Blocks
Blocks are specially prepared and pre-configured options for beautiful grouping of elements based on Columns.
¶ Text
Here you can configure the email background, content padding width, font size, family and weight (thickness), text color and active link color in the email.
¶ Images
In this section, you can search for the image you need by keywords and drag it into the email template workspace.
Using these elements, you can create your own template for campaigns. But you can also choose one of our ready-made templates and edit it if necessary.
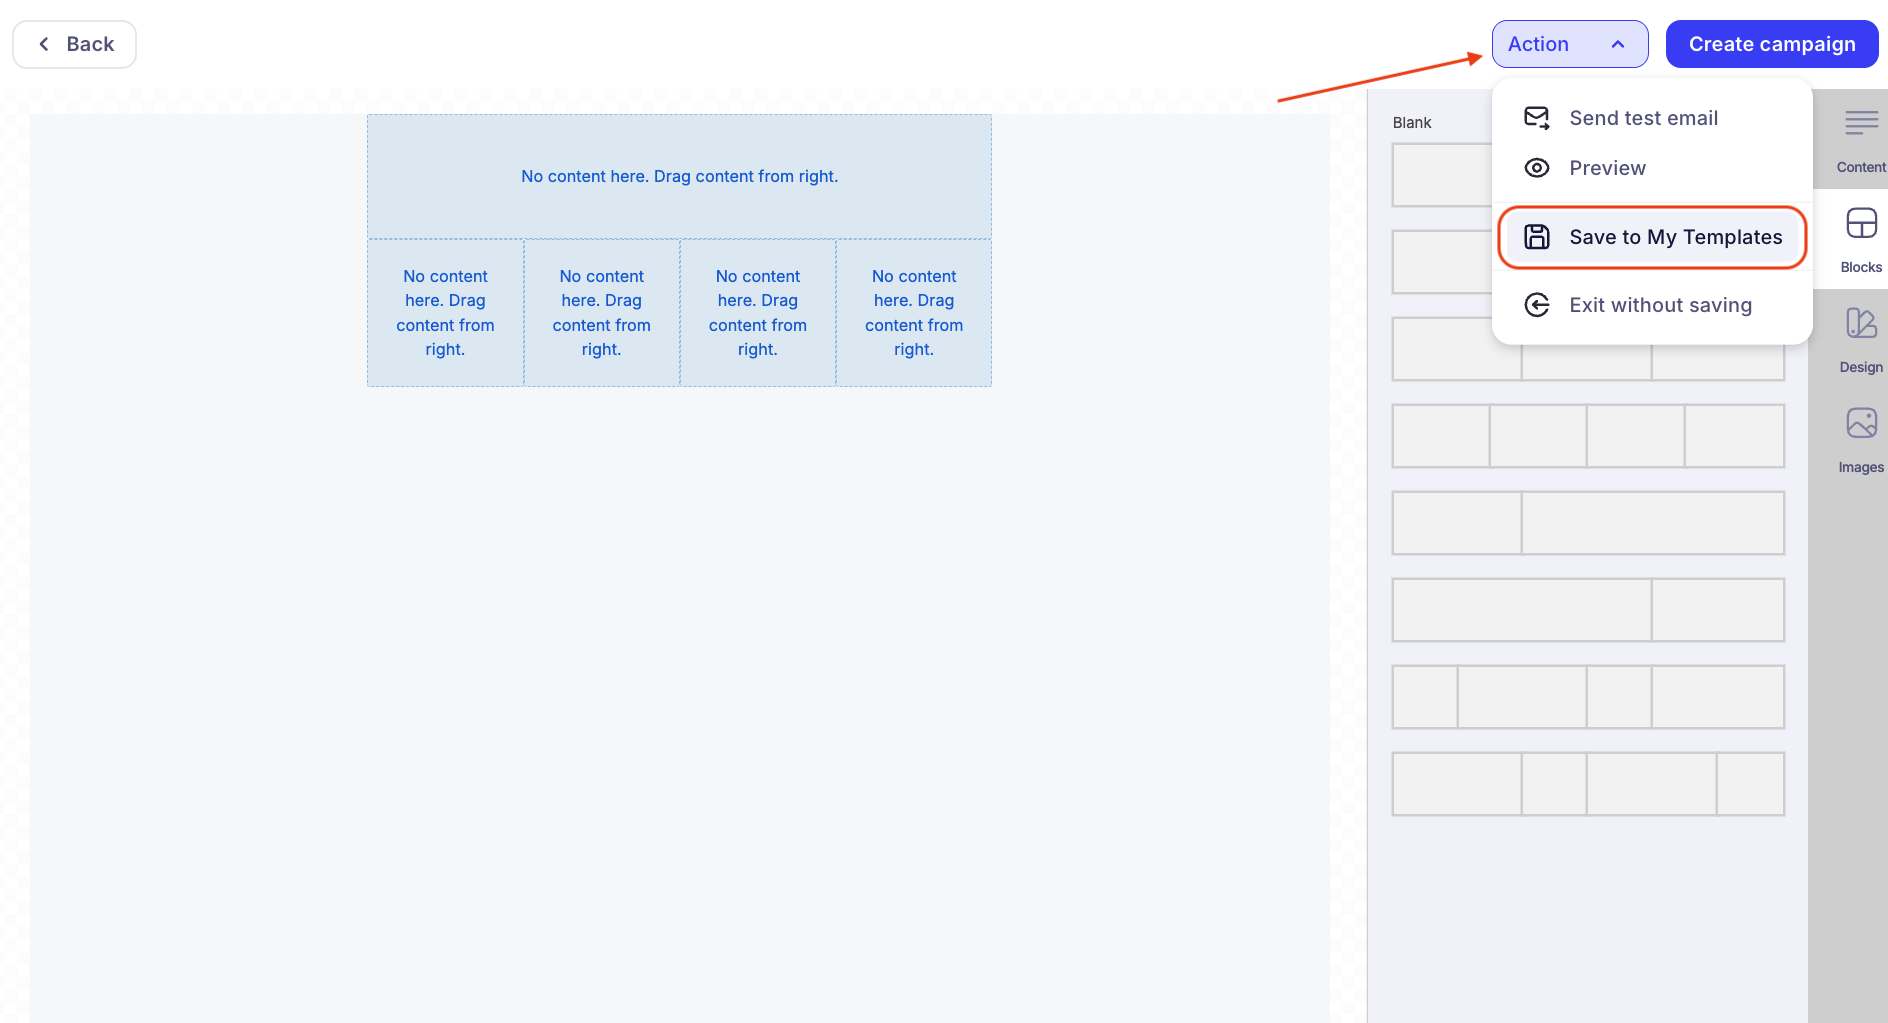
¶ How to Save a Template
After making changes to the template, don't forget to save it. To do this, click the "Actions" button and then "Save to My Templates". Then specify the template name and click "Save" again: