¶ How to Create Email on Your Domain in Google Service
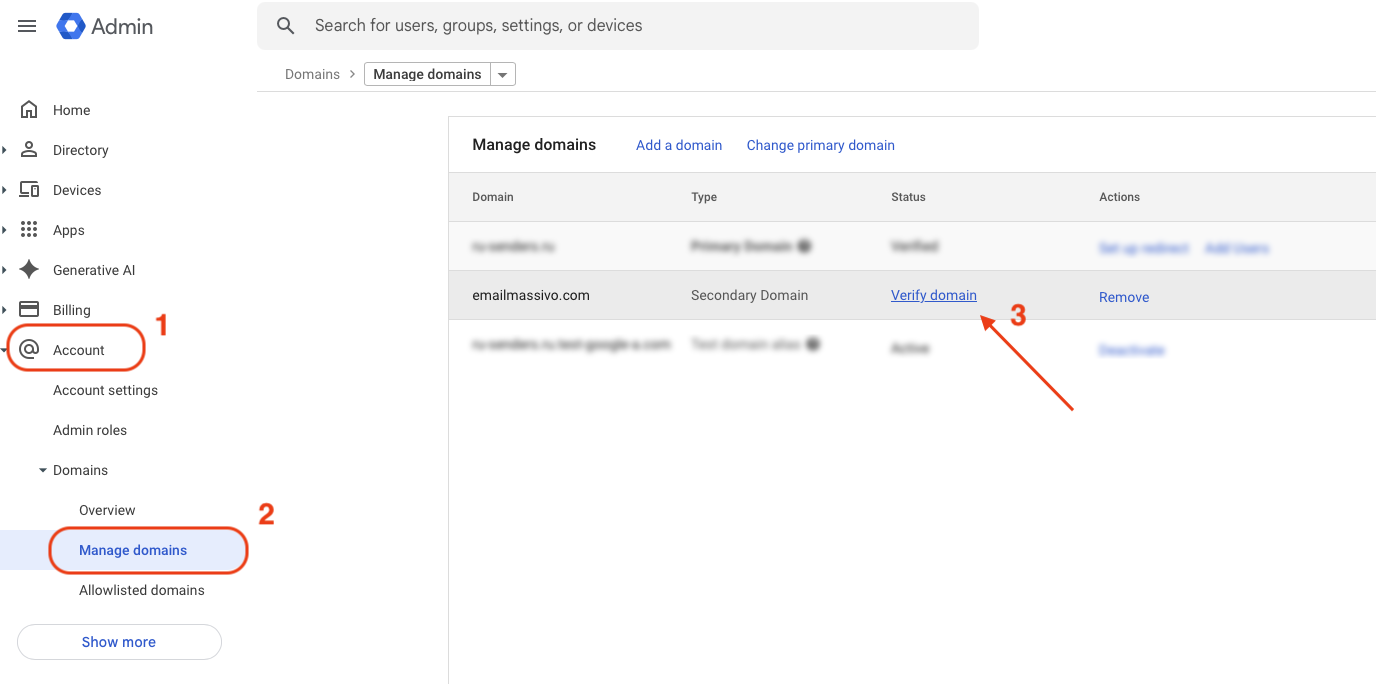
¶ Domain Verification
First, you need to verify domain ownership rights through DNS verification.
Attention! To add a TXT record, you need to have access to edit your domain's DNS records.
Add a DNS record with the specified values:
- Domain/subdomain name: @
- Record type: TXT
- Value is unique for each domain, example: google-site-verification=ХХХХХХХХХХХХХХХ
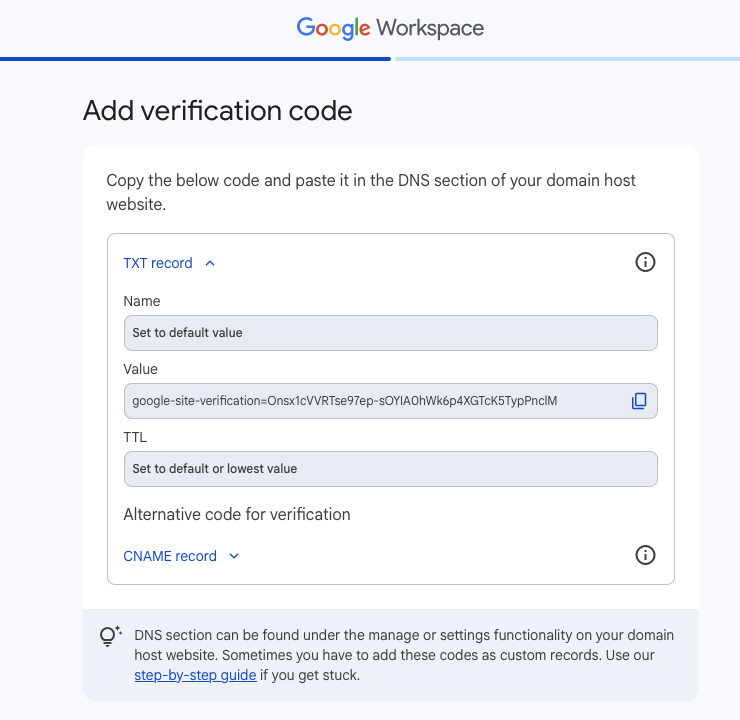
Click the "Verify" button. If your domain registrar cannot use the @ symbol in the domain or subdomain name, add a period at the end of the domain name.

¶ MX Record Configuration
MX record is information about your domain that points to the server responsible for processing your email. If MX records are not configured, you will not be able to receive messages to your email.
MX record configuration for corporate email may differ slightly for each provider, but in the general scenario it's done as follows:
- Go to the website of the provider where your domain's DNS zone is located.
- Log in to "Control Panel".
- Go to the DNS zone management section of your domain.
- Delete all previously configured MX records.
Add a new MX record with the following parameters:
- Subdomain: @
- Value: SMTP.GOOGLE.COM
- Priority: 1
Click Save.
Add another MX record by following the steps described above. Only this time:
In the Server/Mail Server/Value/Answer/Destination field, insert the verification MX record copied earlier.
In the Priority field, enter the value 15.
Verification of settings may take several hours. Verification results will be sent to your email.
¶ SPF Record Configuration
SPF record confirms that verified servers are used for sending emails. It reduces the risk of domain spoofing, increases security level, and helps prevent emails sent from your addresses from ending up in spam.
- Go to the website of the provider where your domain's DNS zone management is located.
- Log in to "Control Panel".
- Go to the DNS zone management section of the desired domain.
- If there are no other SPF records in your domain's DNS records, add a new TXT record with the following value:
v=spf1 include:mailmsv.com include:_spf.google.com ~all
¶ DKIM Signature Configuration
DKIM signature confirms sender authenticity and distinguishes emails from fraudster campaigns. The email system automatically moves emails with DKIM signature to the "Inbox" folder.
To configure your own DKIM signature for emails, you need to add a new TXT record. To do this:
- Go to your provider's website managing your domain's DNS zone.
- Log in to "Control Panel".
- Next, find the DNS zone management section of the domain.
- In this section, add a new TXT record with the value specified in the "Server Status" section. It's advisable to enter the value in quotes.
- Note that some registrars, such as TimeWeb, require creating a subdomain before configuring DKIM. Then you can add a TXT record with DKIM parameters.
After configuring MX, SPF, and DKIM records for your domain, you can create corporate mailboxes.
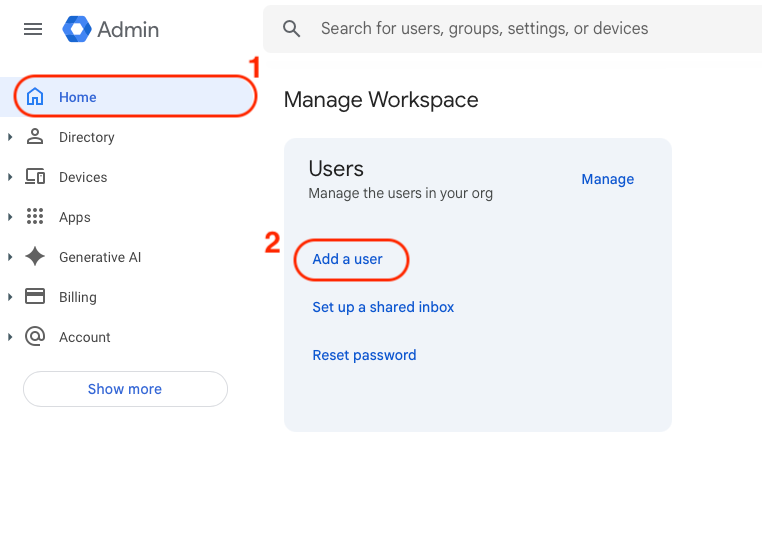
¶ Creating Mailboxes
Creating mailboxes is the final step in the corporate email connection process. At this stage, you add employee accounts and make necessary settings for their work.
In the opened window, fill in all required fields.
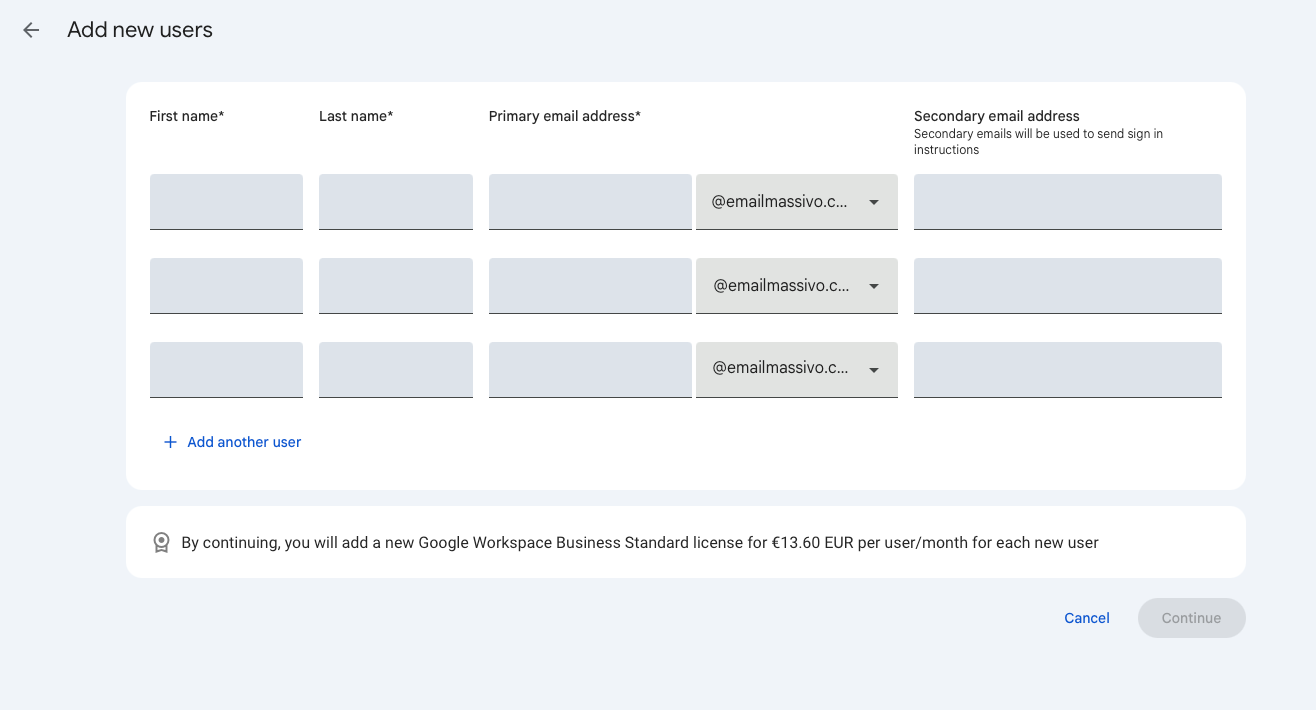
Done! Corporate email on your domain has been created and you can send campaigns from it.