¶ How to create and run an A/B test
A/B testing allows you to identify the most effective option by comparing several versions of a campaign. You can experiment with subject lines and preheaders to determine which campaign will attract more opens.
¶ Creating an A/B Test
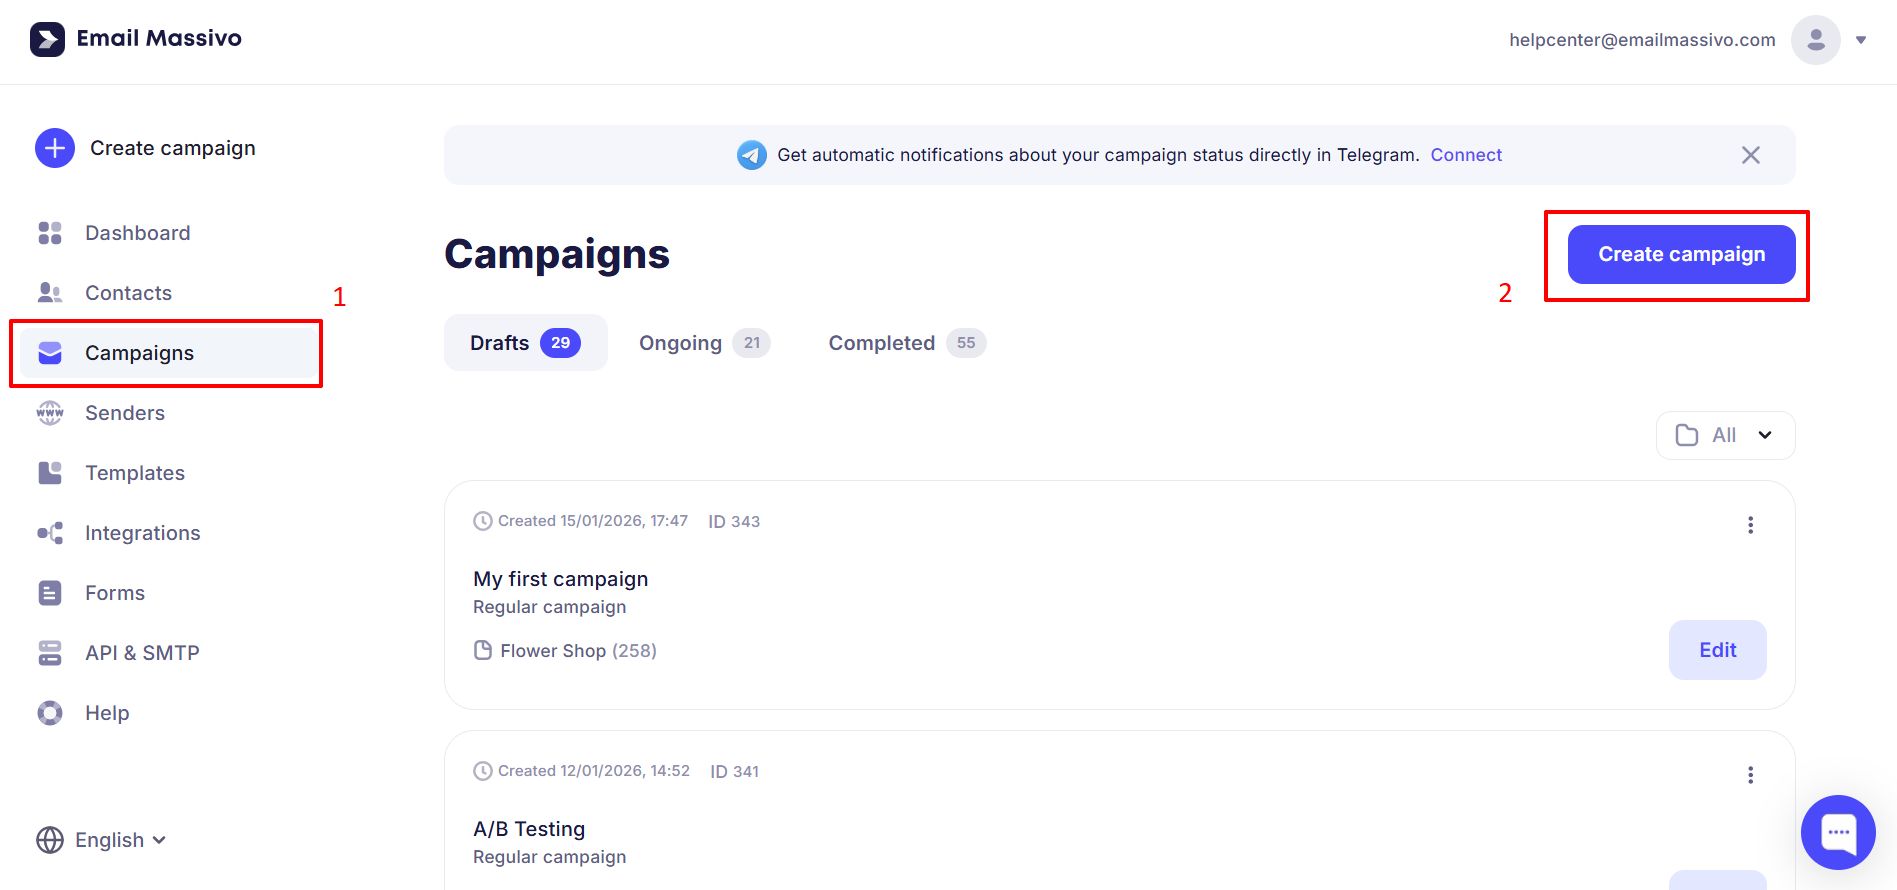
An A/B test is created the same way as a regular campaign. Go to the Campaigns section and click Create campaign.
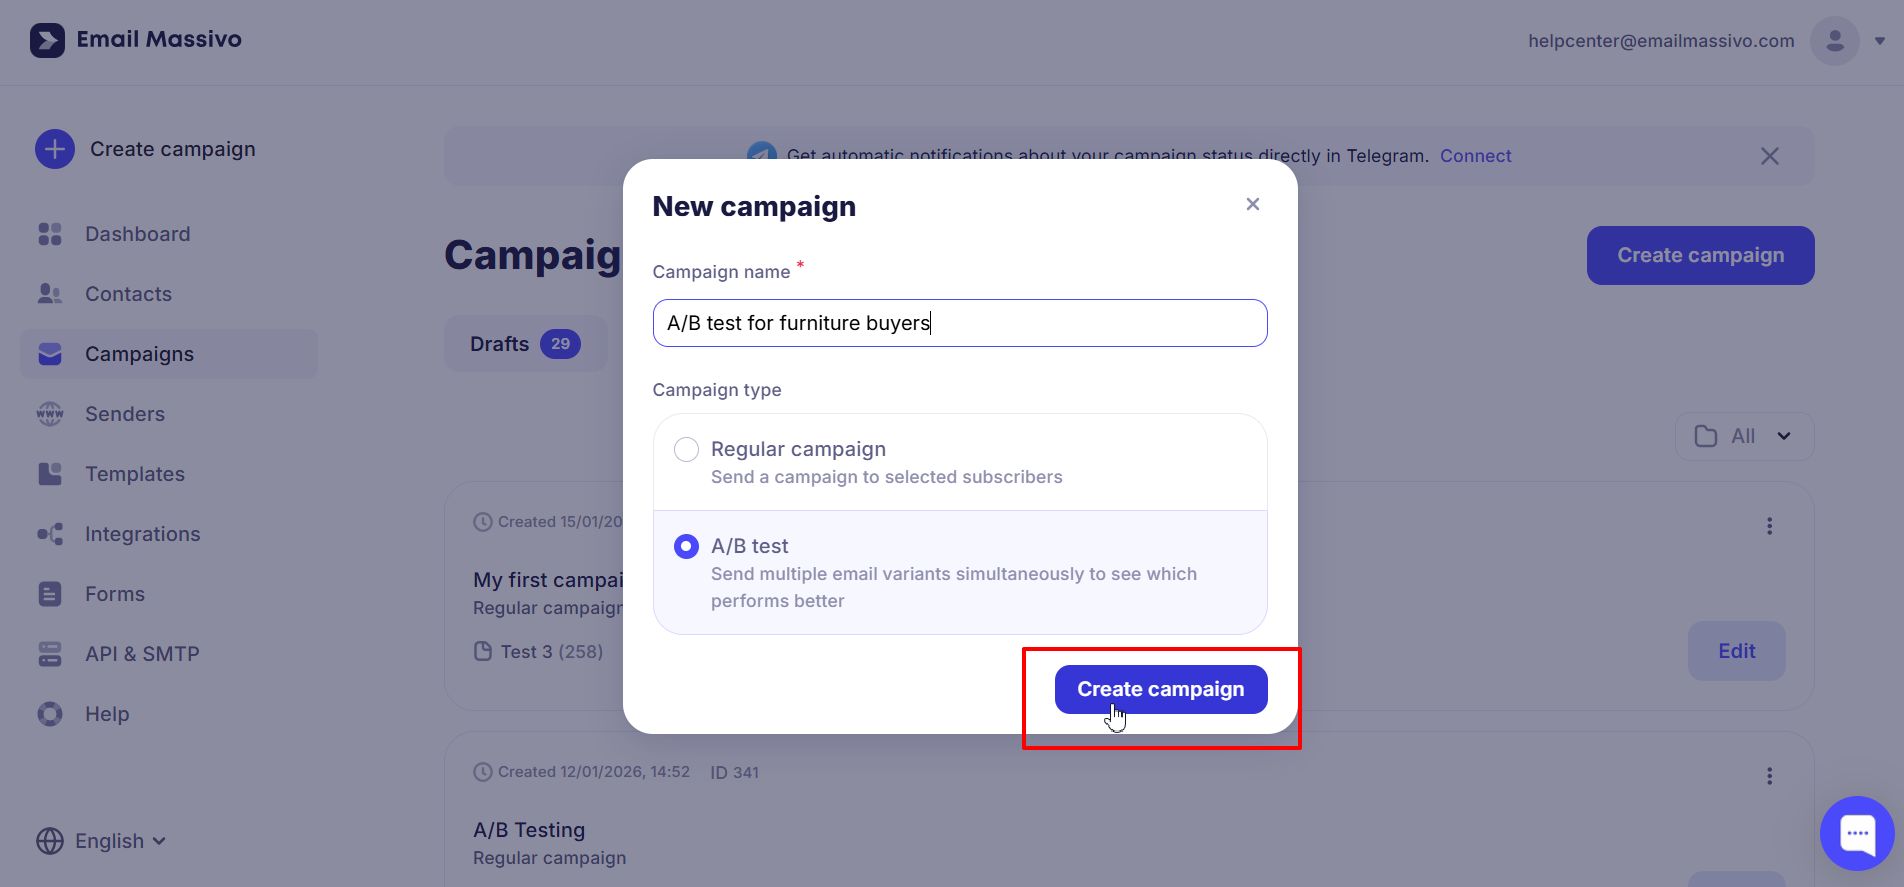
Enter the campaign name, select the A/B Test campaign type, and click Create campaign.
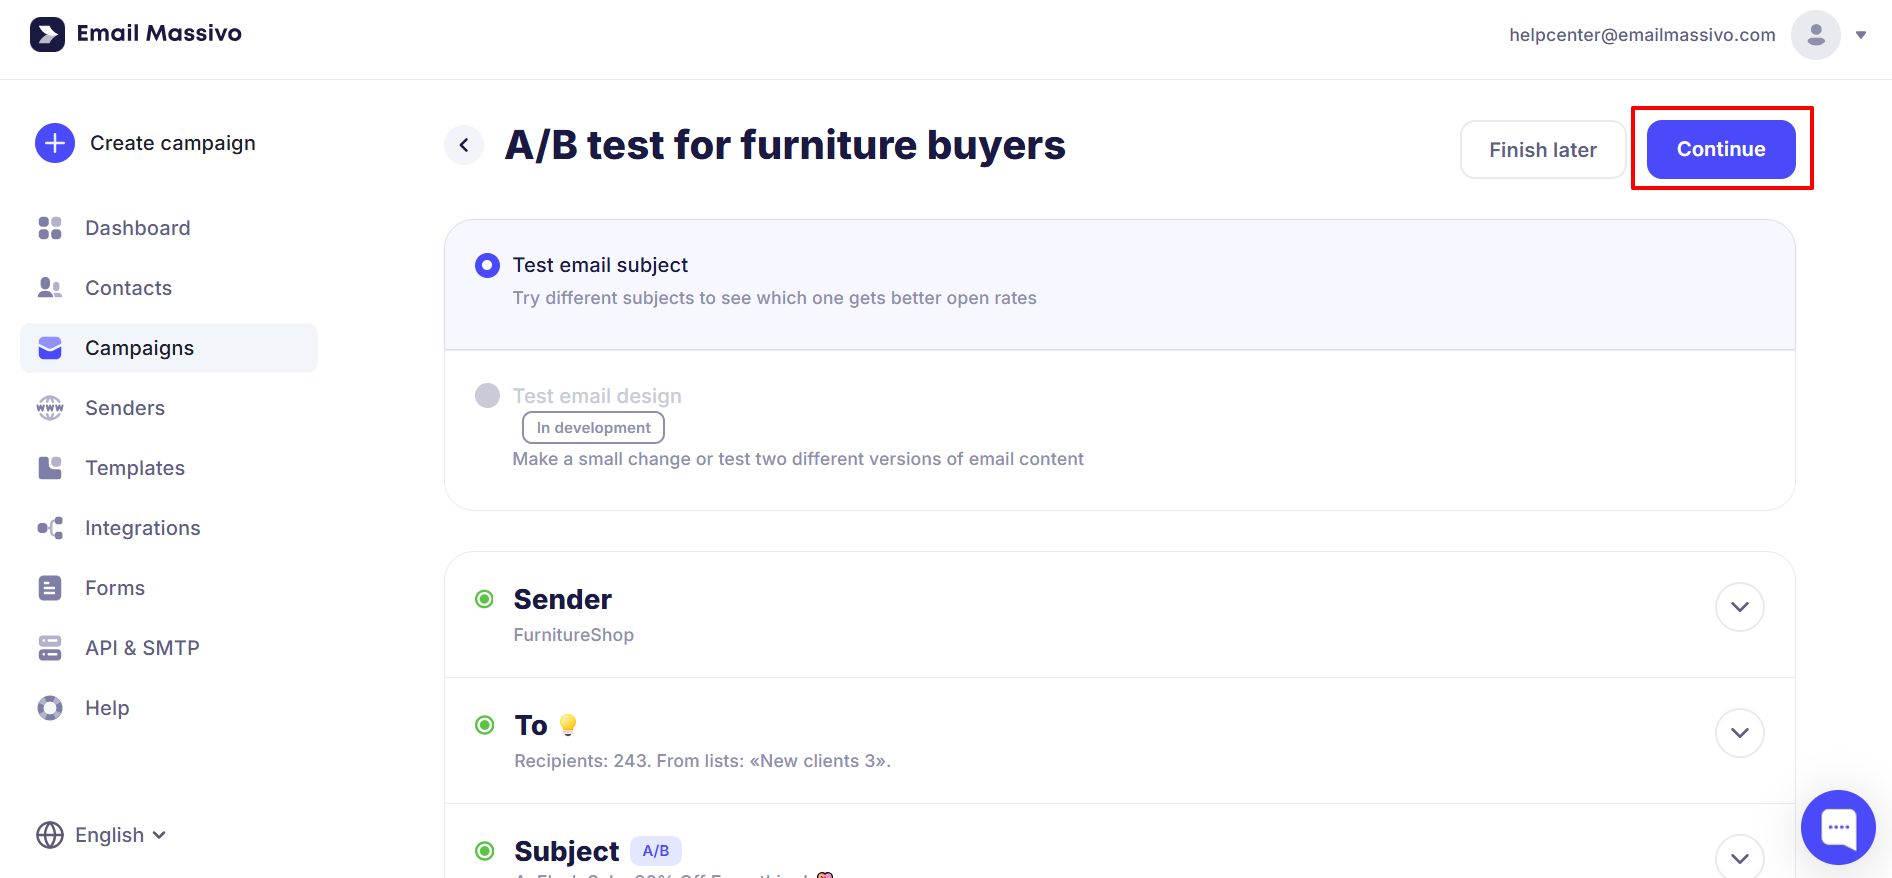
By default, the Test email subject option will be selected, but soon you will also be able to test email design.
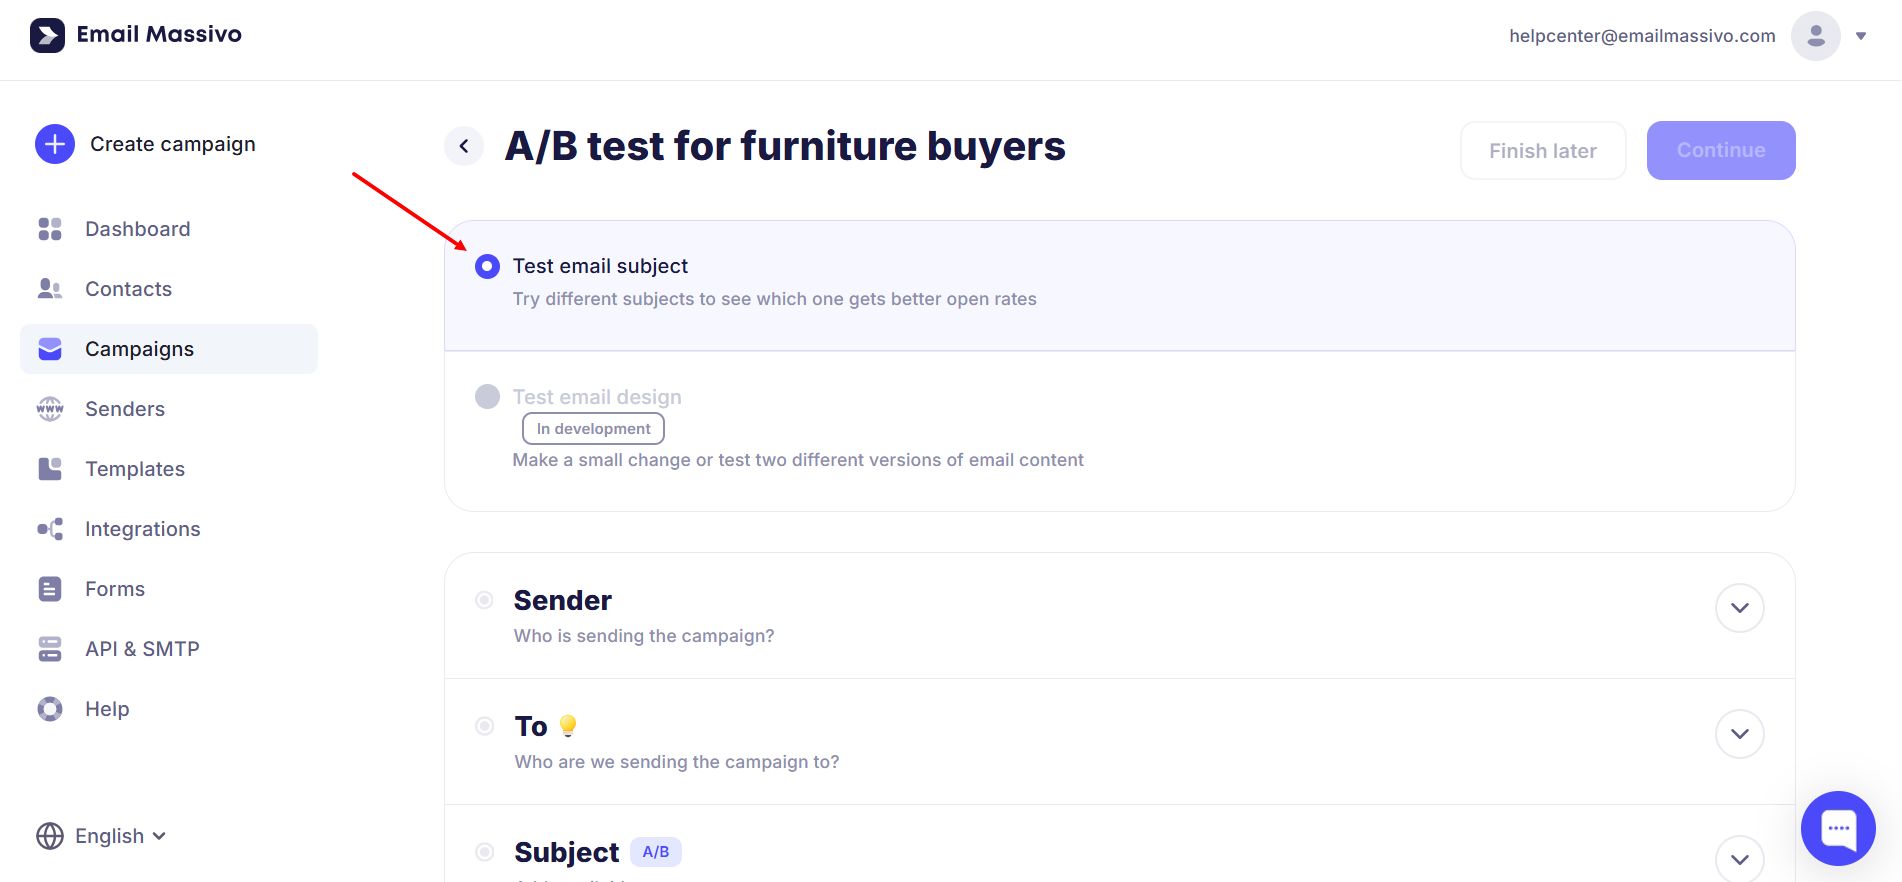
Continue creating the campaign as usual: specify the sender, select a contact list, and upload a template.
Important!
To send an A/B test, you need to select at least 20 recipients.
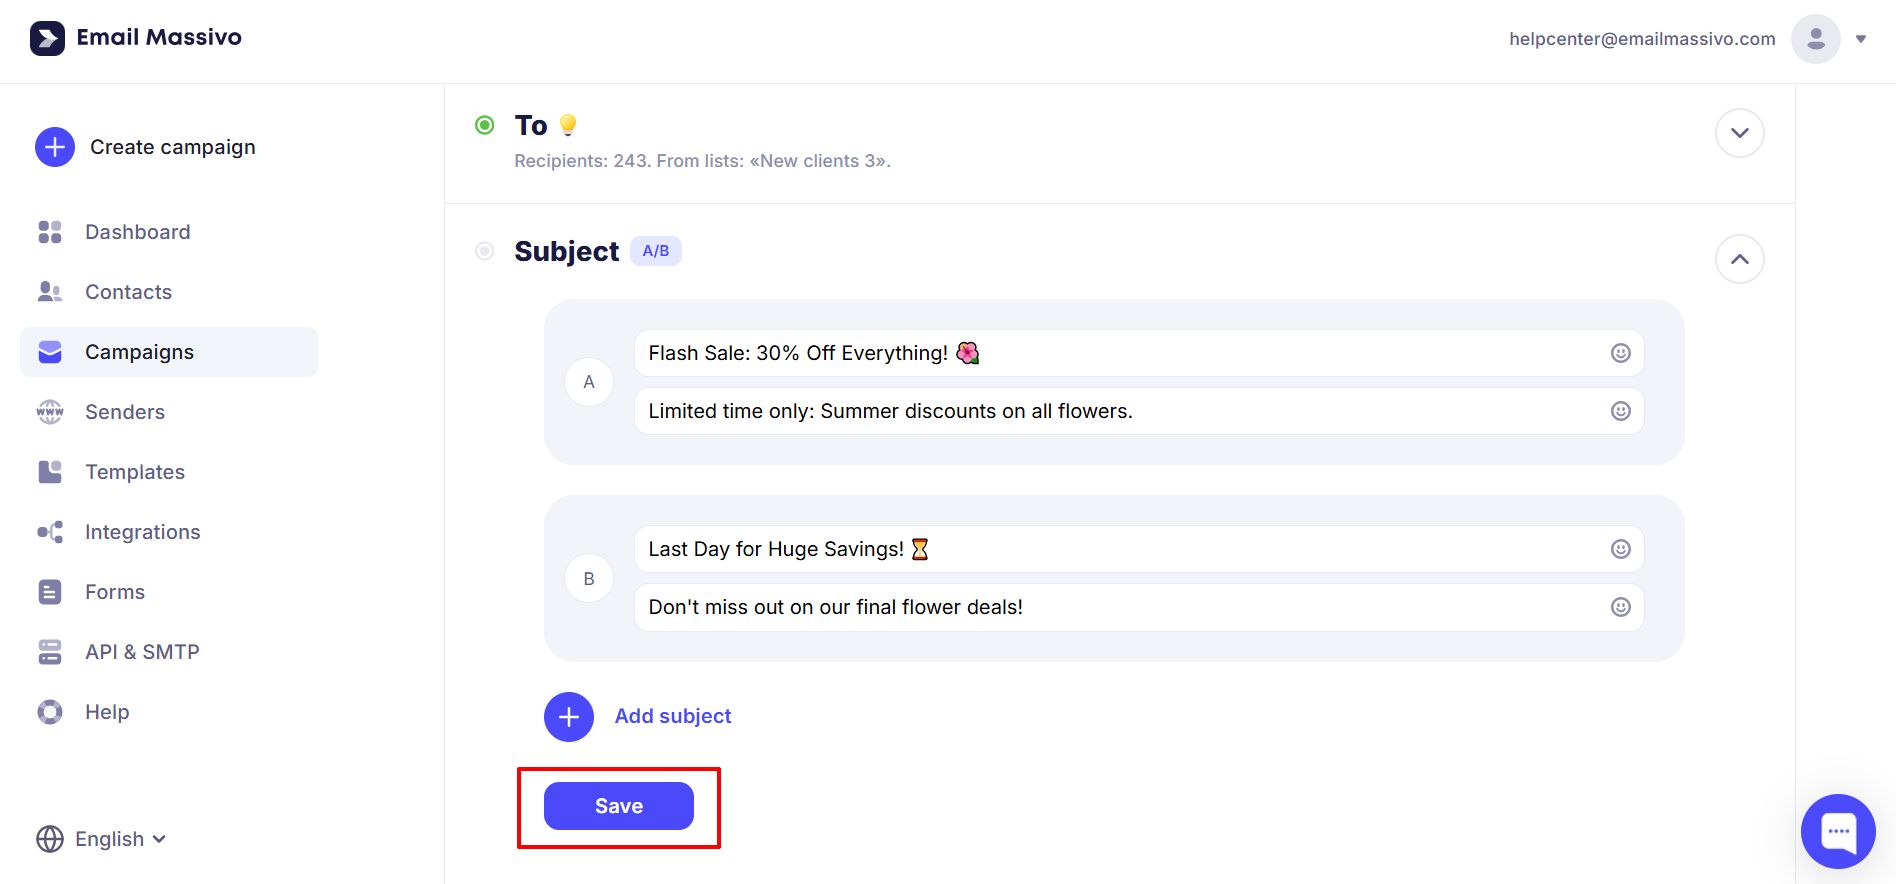
At the campaign creation stage, specify the subject lines and preheaders you want to compare.
The subject line is the part of the message that a subscriber sees when they open their inbox. Subscribers judge whether to open an email based on the subject line, so it should be catchy, informative, and concise.
A preheader (preview text) or subtitle is a text fragment that appears in the mailbox immediately after the sender's name and subject line. The purpose of the preheader is to draw the reader's attention to key aspects of the email.
If necessary, you can add more subject line options for A/B testing. The maximum number of subject lines for comparison is 5.
Click Continue and proceed to the Test conditions stage.
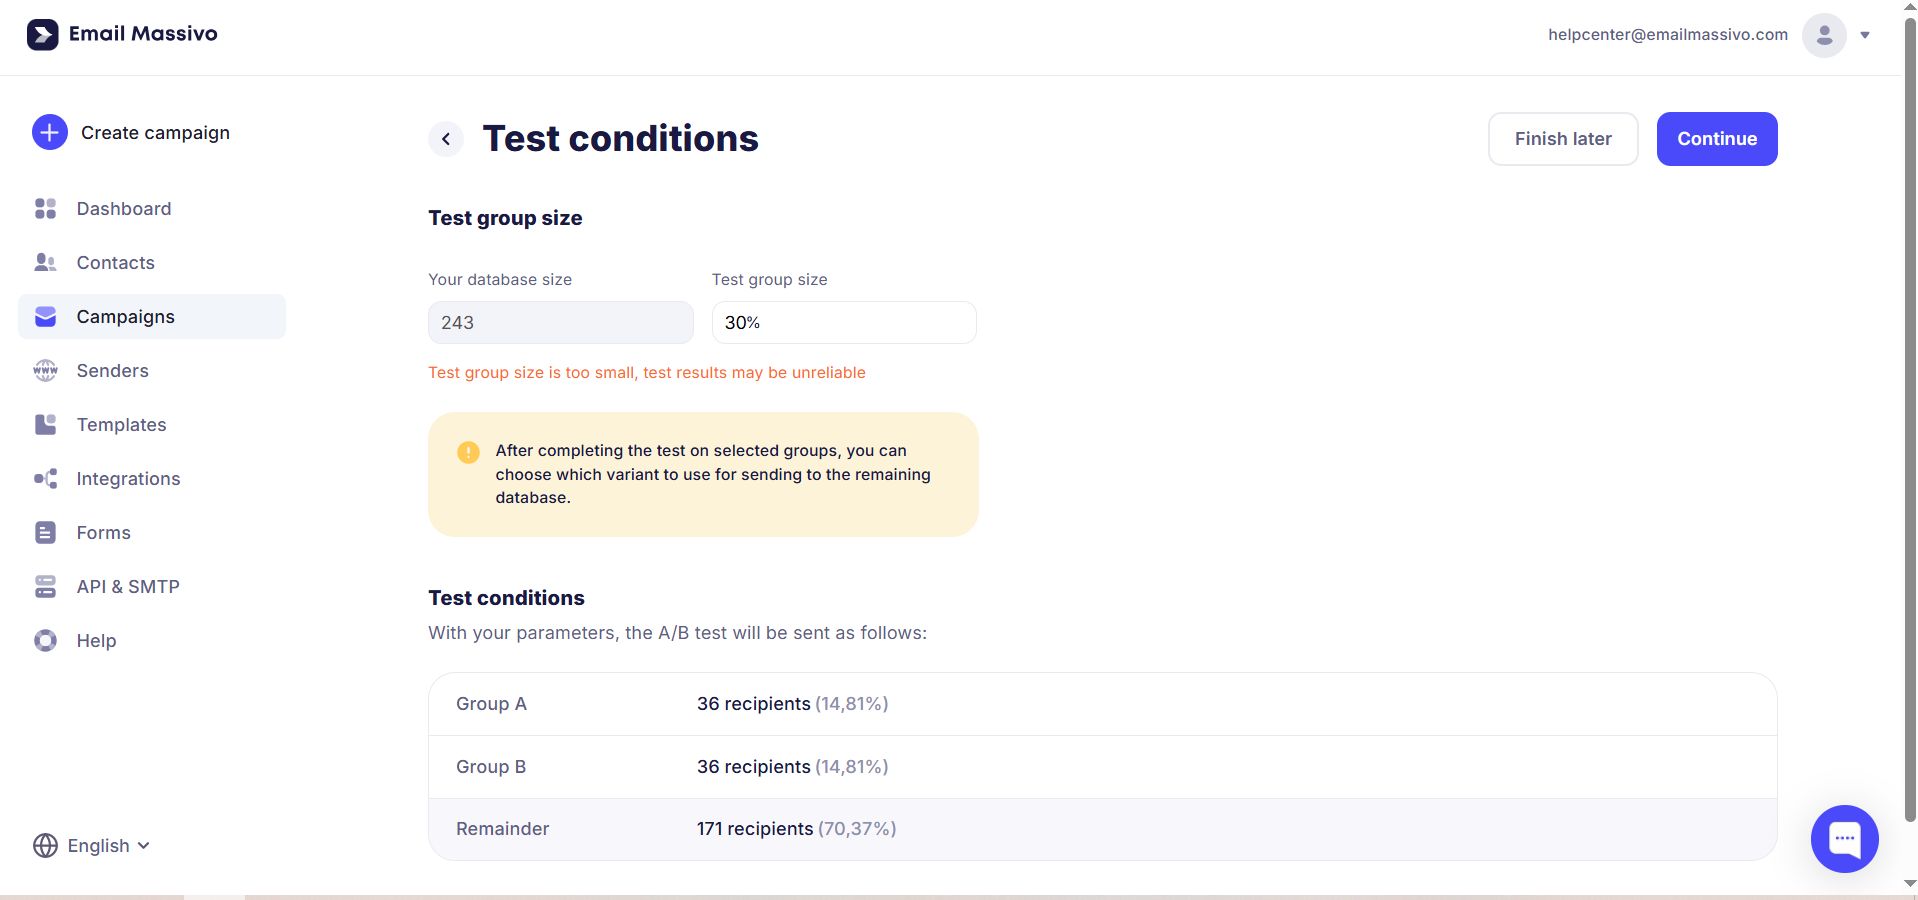
¶ Setting up test groups
Select the test group size.
It is specified as a percentage of the selected base and is divided equally among all test subject lines. For example, if you have 1000 addresses in your base and want to test 2 subject lines, 10% of the base will be allocated for testing by default. This is 100 addresses, which will be divided equally between the two subject lines. As a result, Subject A will be sent to 50 recipients, and Subject B will also be sent to 50 recipients. You will have a base of 900 recipients left for the main campaign (1000 — 100/2 = 900).
The percentage of the base for testing can be changed. In our example, let's choose 30% of the total audience: 15.22% will receive the first option, and another 15.22% will receive the second. After the split test is completed, you can choose which option to use for sending to the remaining 69.57%.
Click Continue.
Check all the data and send the campaign.
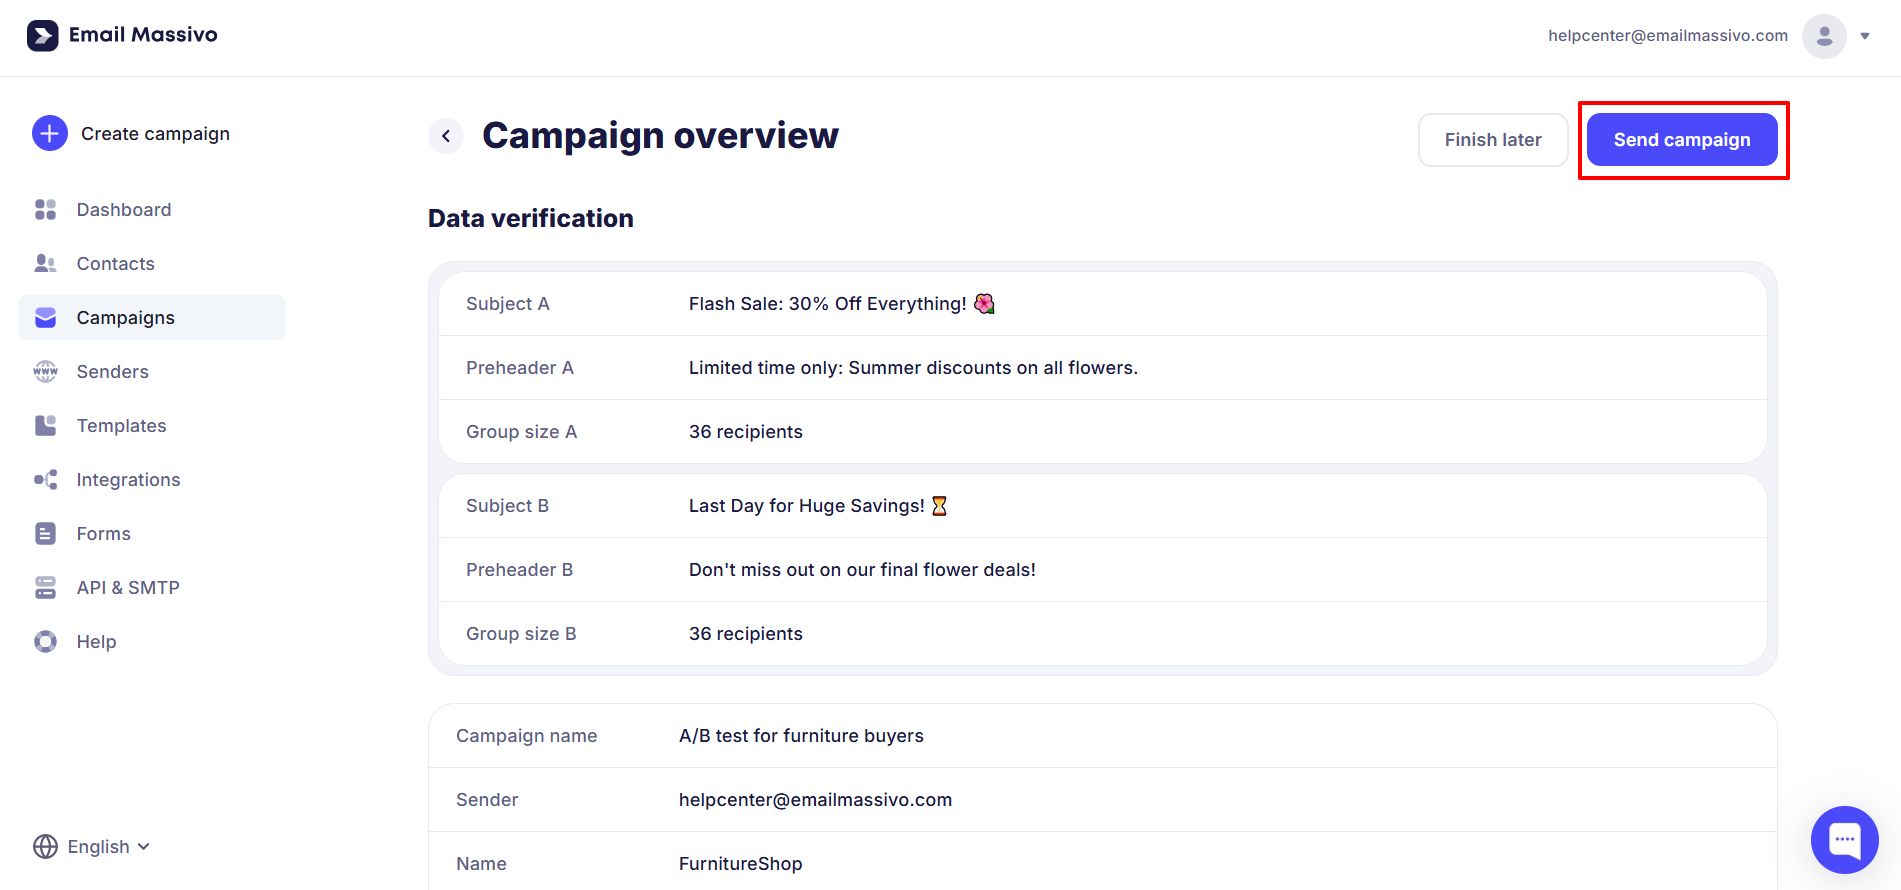
Done! The A/B test has been created.
After sending, the campaign will go to review so that our support service can check it. After passing review, your campaigns with different subject line options will be sent to the selected contact list.
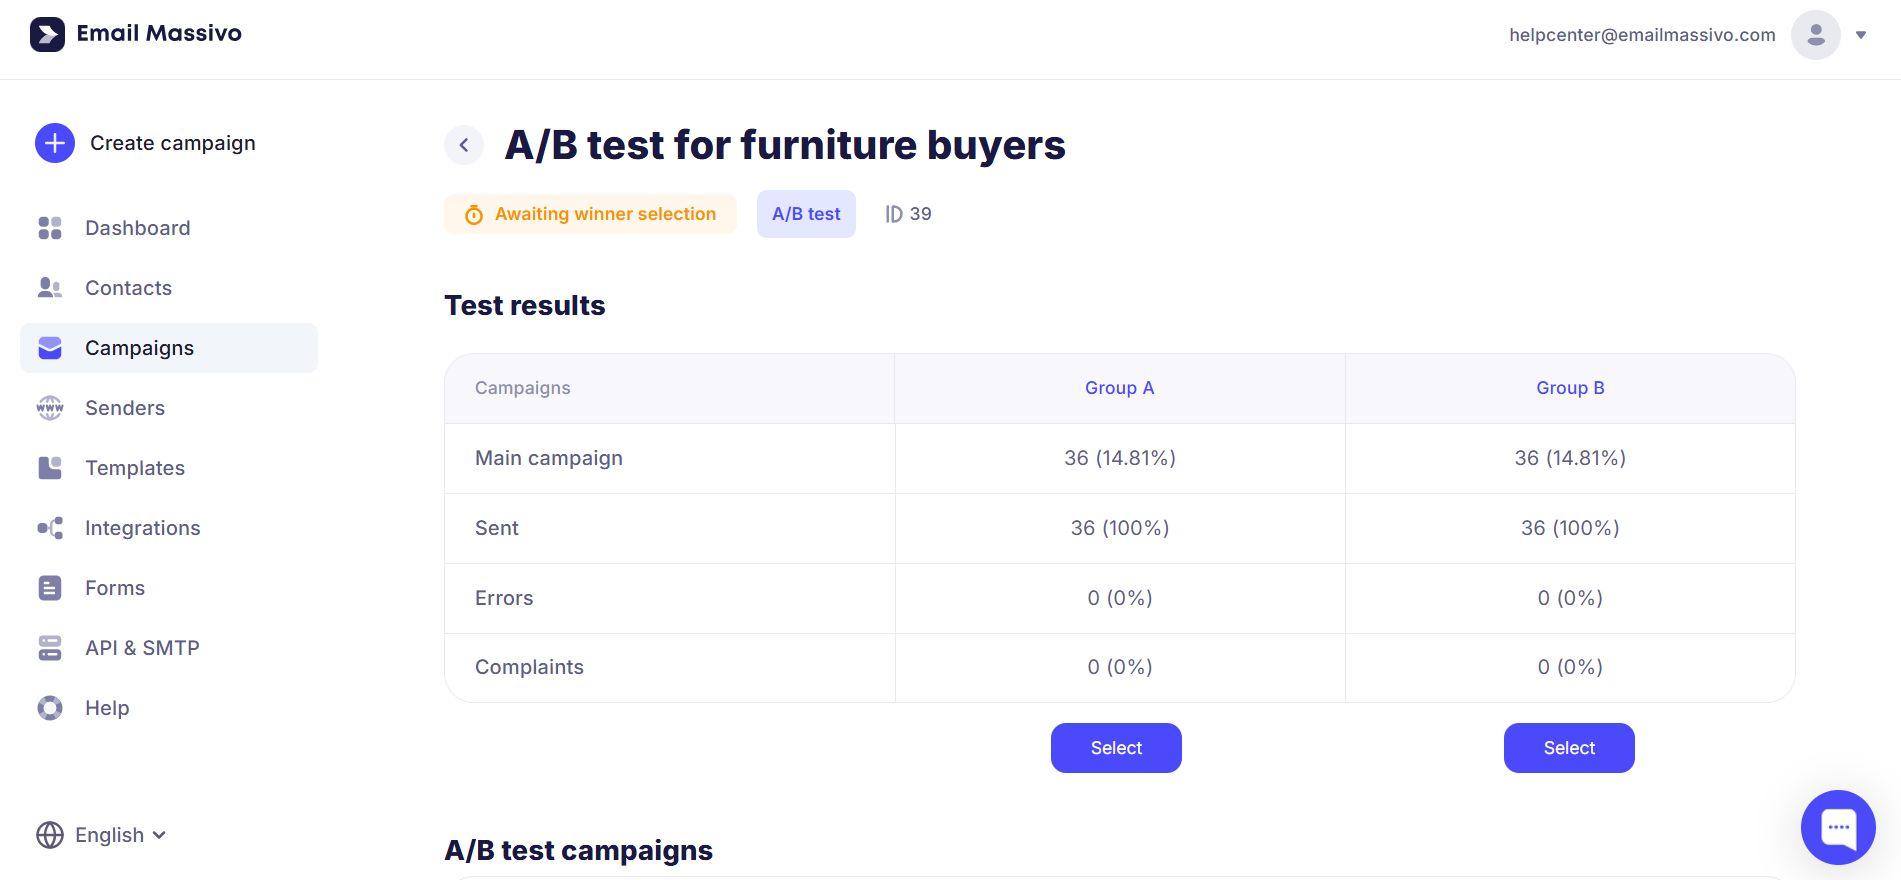
After the campaigns to test groups are completed, the A/B test will transition to the Awaiting winner selection state.
Go to Campaigns → Ongoing to view the results. You can see statistics by groups directly from the card by clicking Select A/B test winner.
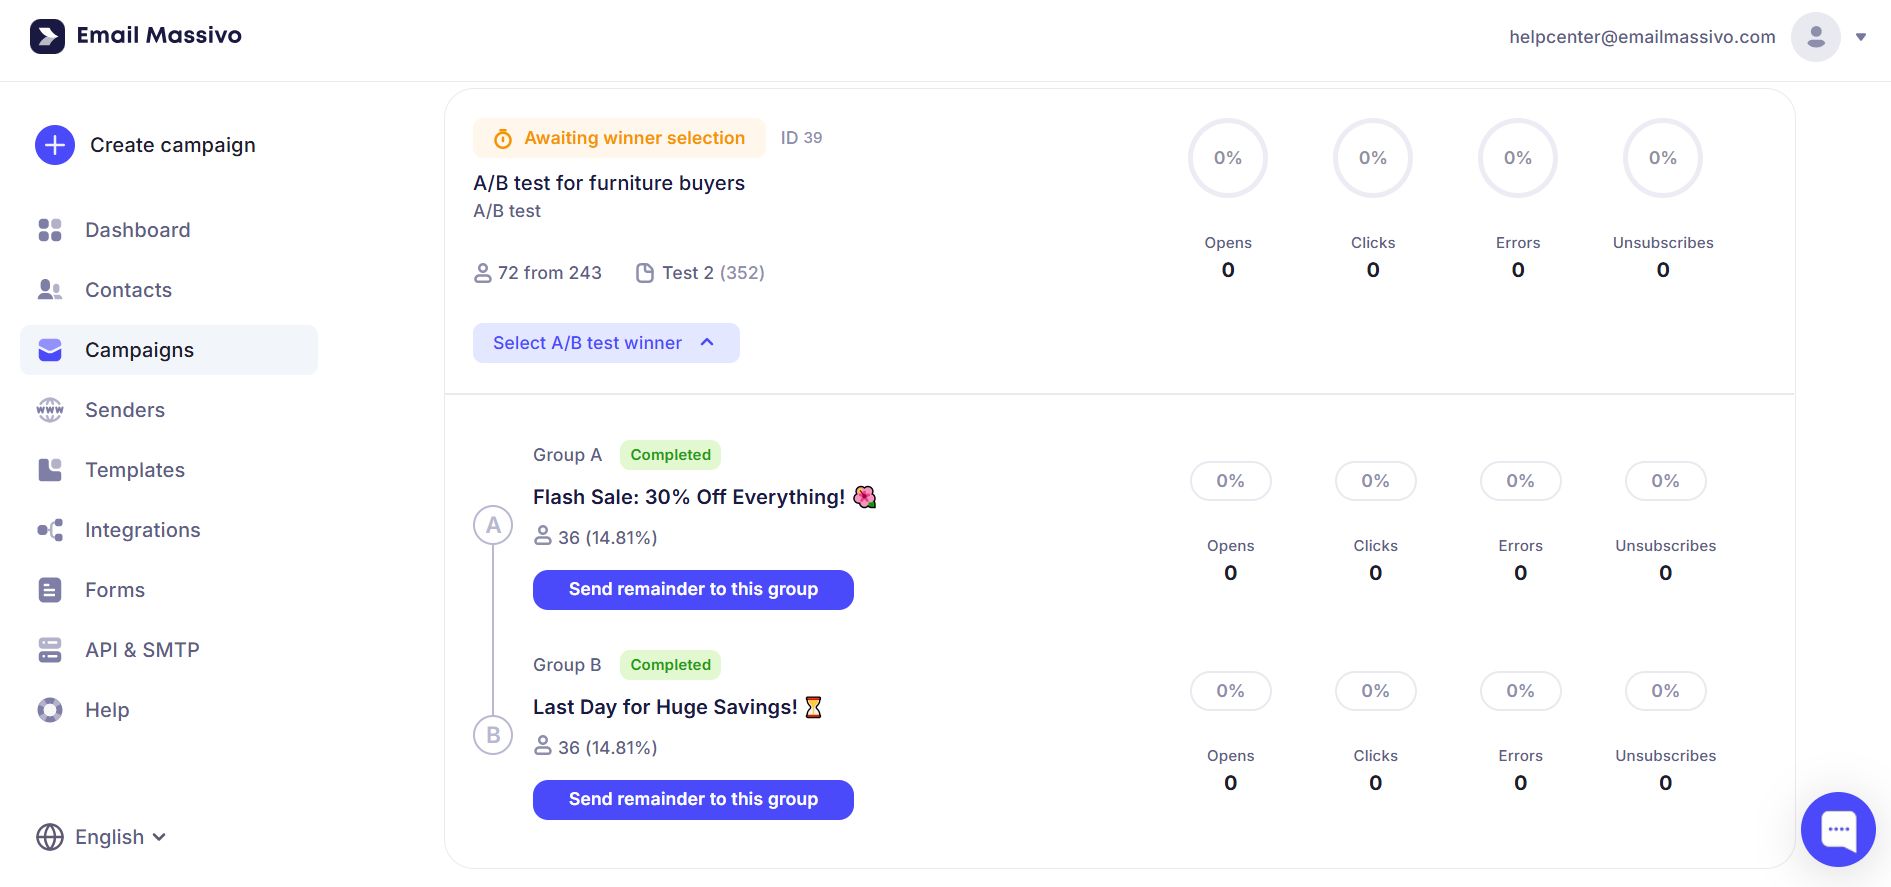
Or by clicking on the test name in the main card — then you will go to the test overview.
To get a detailed report and statistics for each group separately, go inside the main card and click on the name of the desired campaign.
Important!
Statistics for sent test campaigns are not collected immediately, so don't rush to send the final campaign, but wait some time for more accurate statistics.
¶ Selecting the winner
After studying the statistics of campaigns with different subject line options and choosing the best one, you need to send the remainder to complete the A/B test.
To send the final campaign, click Select under the desired option.
Confirm sending the final campaign by clicking the Send to remainder button.
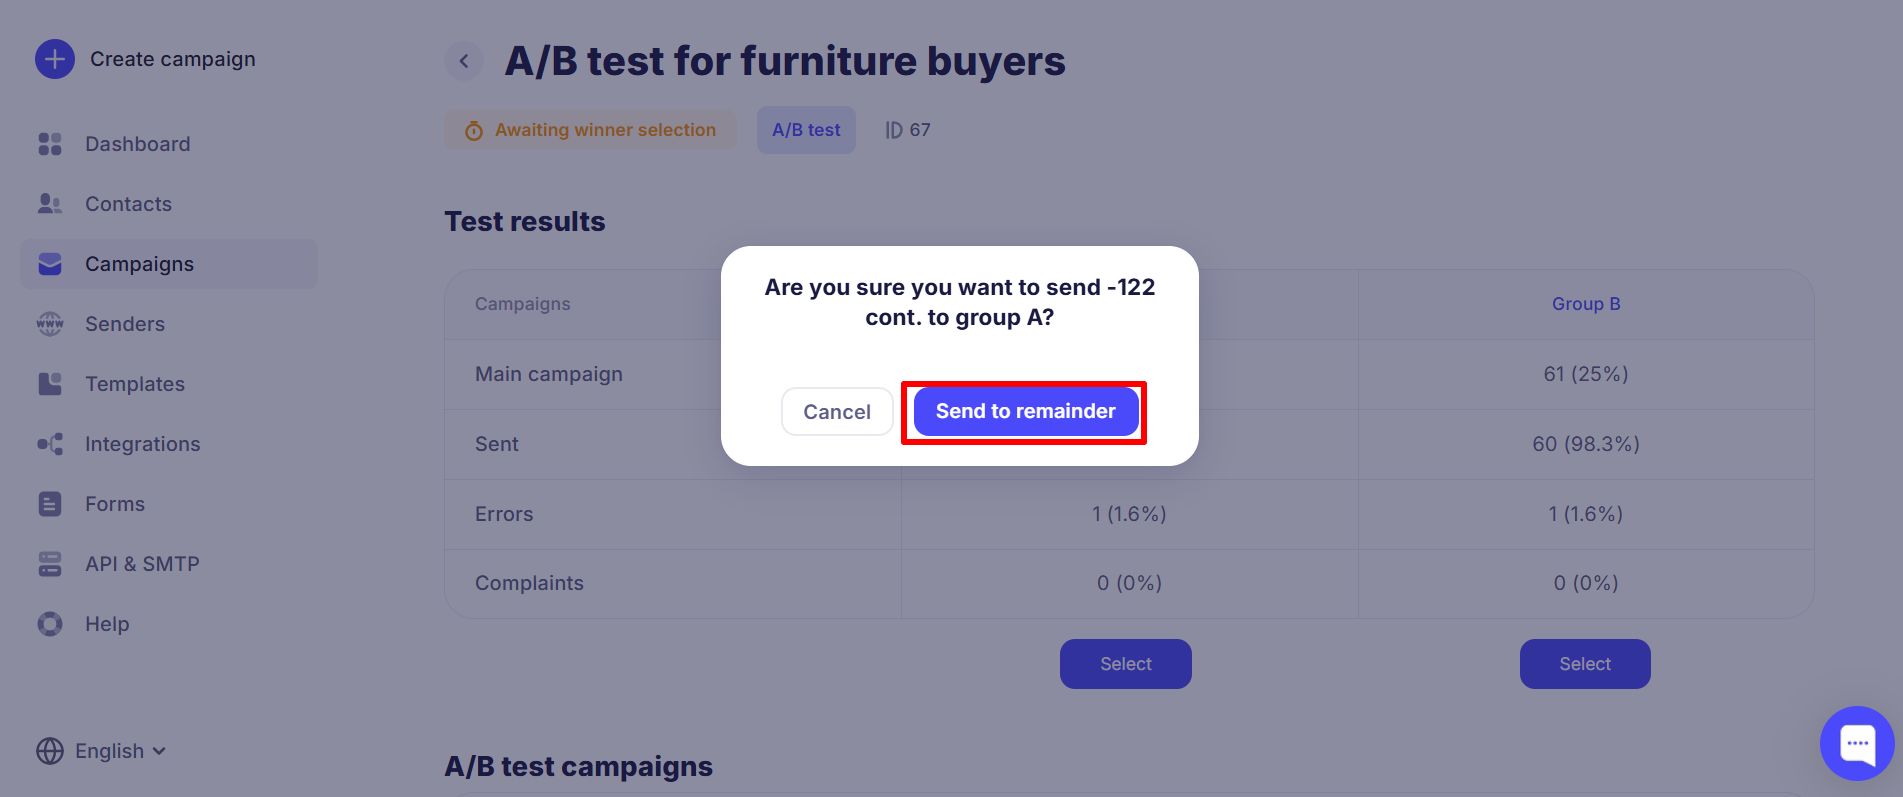
The final option is sent to the remaining group of addresses with the subject line that you set for the test group selected as the winner.
After the A/B test is fully completed, you can study the report and statistics of the final campaign.